All Categories > Customizing > How to Sort Tables in the Finance Planner for Creatives
How to Sort Tables (Like Income + Expense Logs) in the Finance Planner for Creatives
Need to organize your data by date, amount, category, or any other column in the Finance Planner for Creatives? Sorting helps you quickly make sense of your transactions.
✅ How to sort a table:
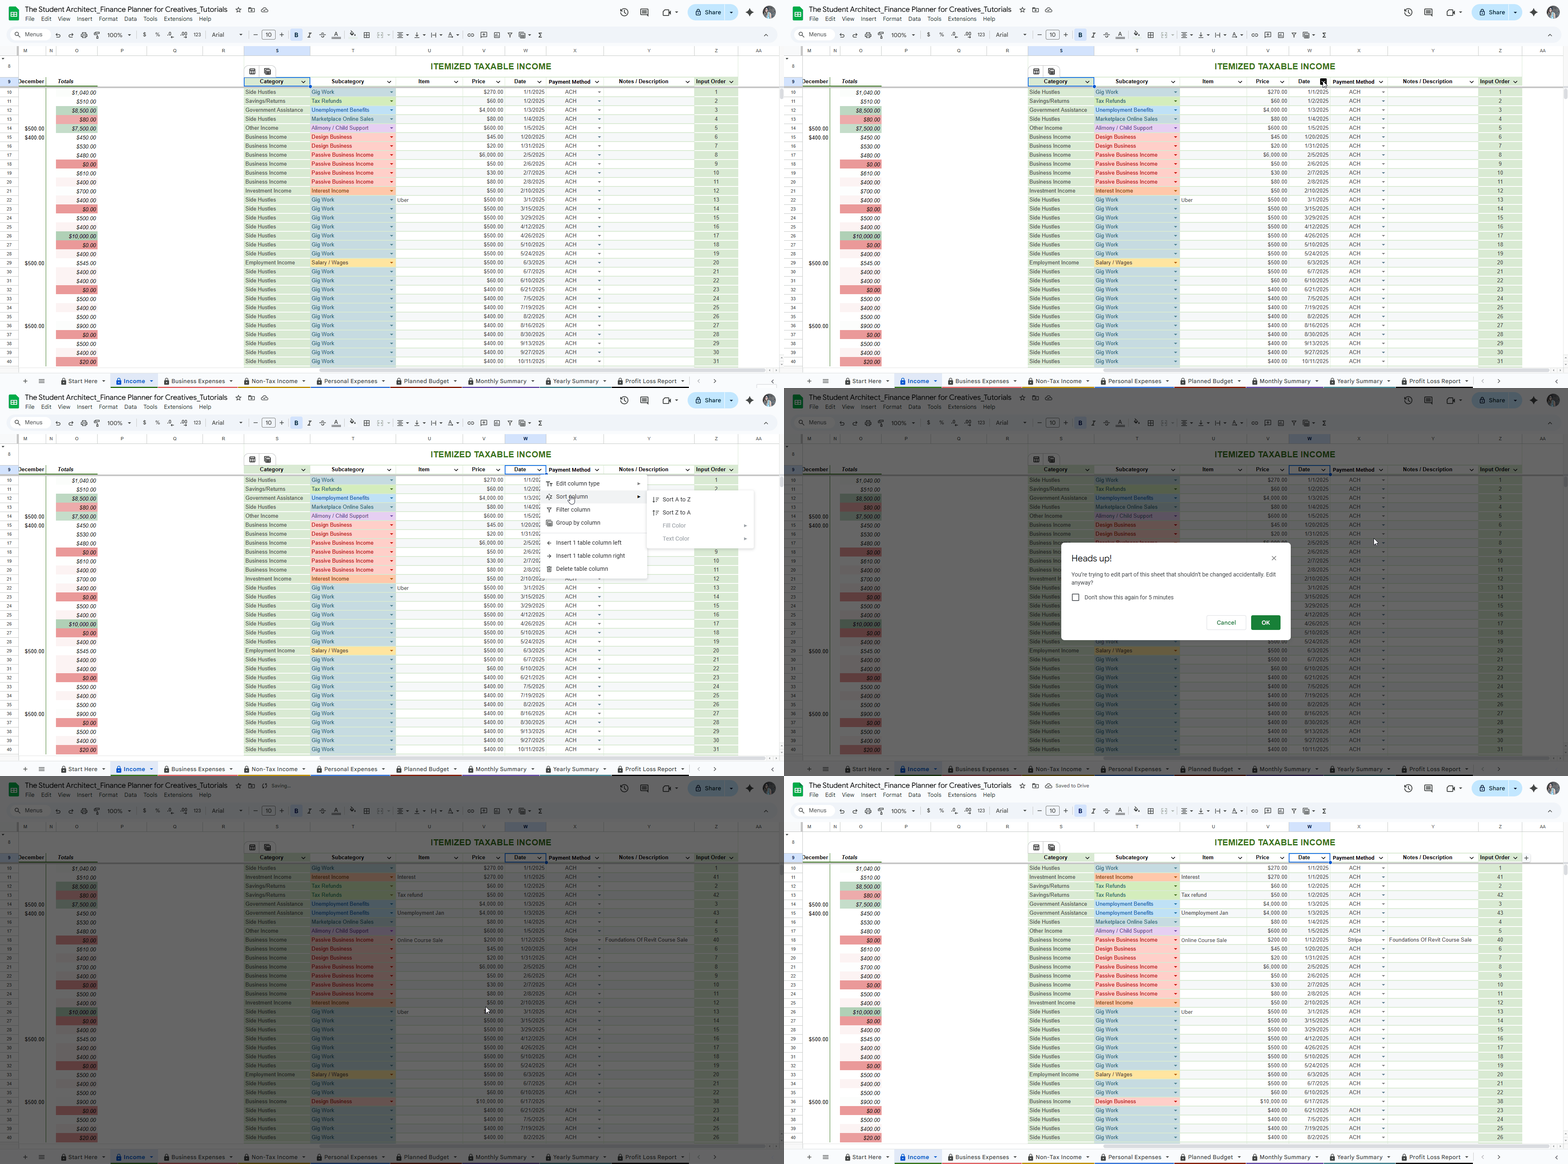
Find the table you want to sort.
Click the down arrow (▼) in the column you want to sort.
Go to Sort Column and choose:
Sort A → Z for ascending (e.g., oldest to newest, lowest to highest)
Sort Z → A for descending (e.g., newest to oldest, highest to lowest)
💡 Common ways to sort:
By Date to review your finances chronologically
By Price to spot large transactions
By Category or Subcategory to group like entries together
🔁 How to Undo Sorting:
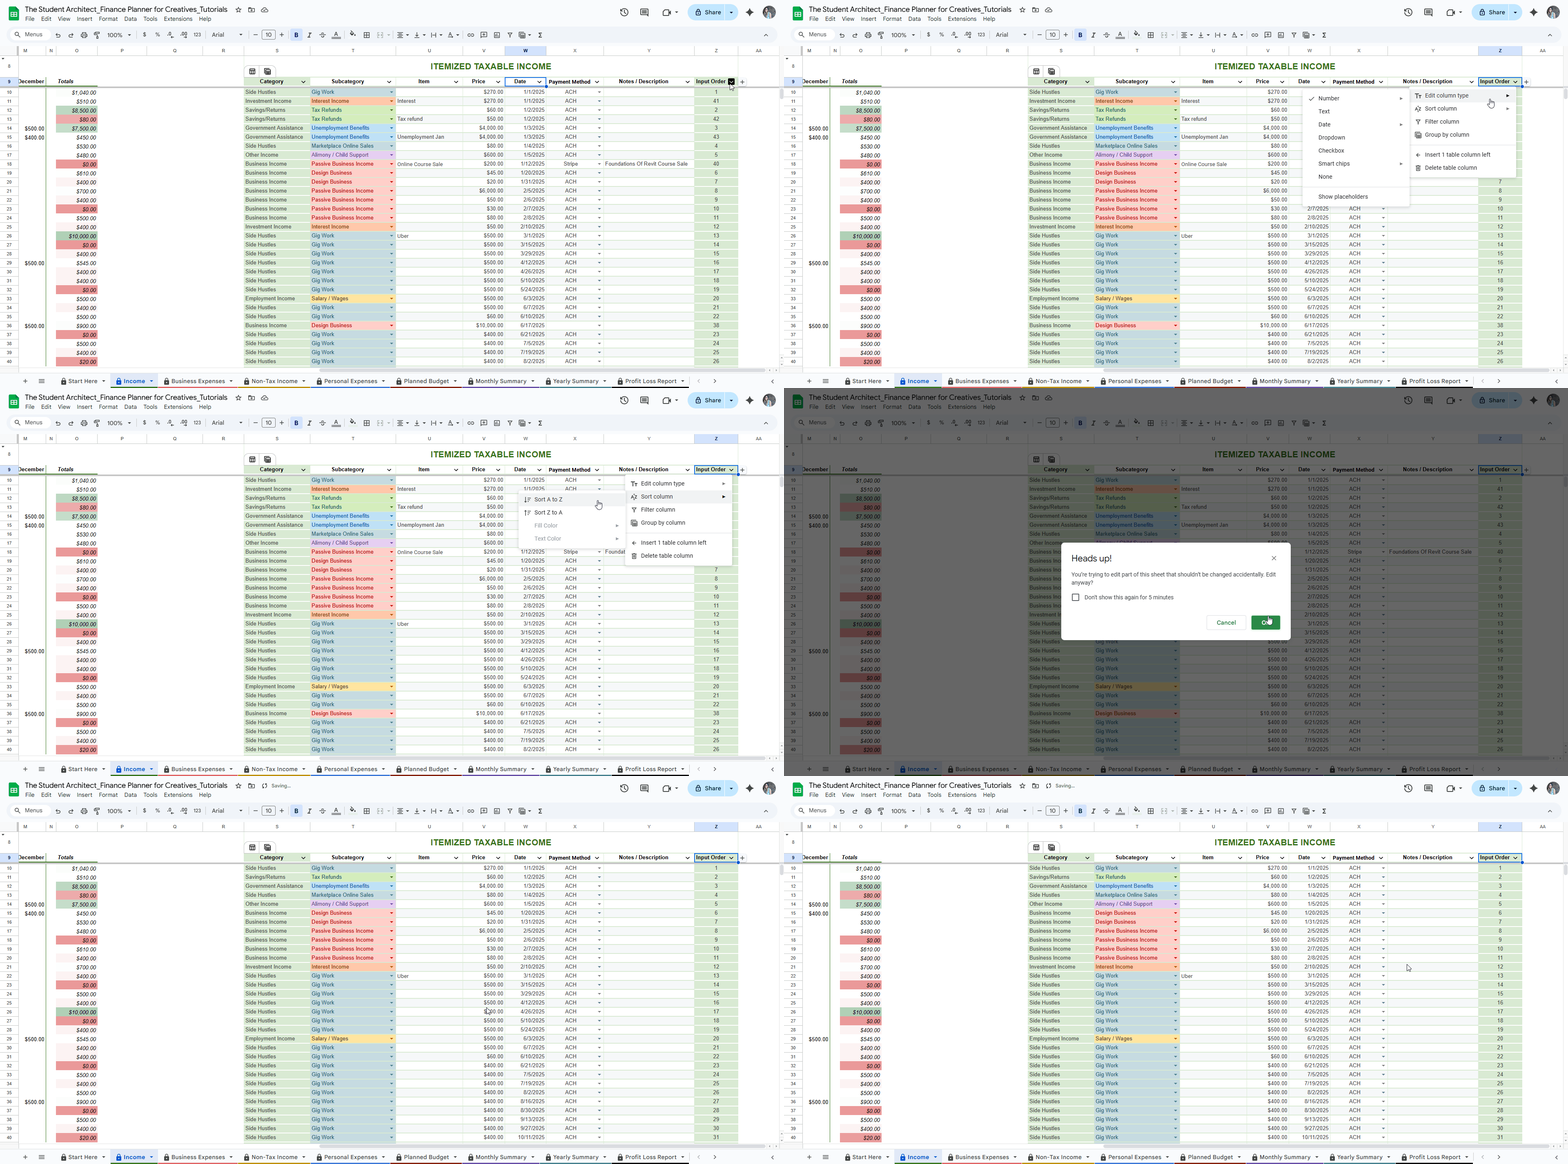
There is no “remove sort” option like there is for filters. So here are a couple of ways to go back to your original input order.
You can remove the sort using the undo button (Ctrl+Z)
Sort by the Input Order column using the steps described above to go back to your original input order
⚠️ Warnings:
You may see a popup about editing in a protected range or changing cell content — you can safely ignore this if you're only sorting a table. See more on popup warnings here →
Sorting is not permanent, but there’s no “remove sort” button. To return to your original input order, follow the steps above for how to undo sorting.


