Customizing

How to Hide and Unhide Columns You Don’t Need in the Finance Planner for Creatives

All Categories  >  Customizing  >  How to Hide and Unhide Columns You Don’t Need in the Finance Planner for Creatives


How to Hide and Unhide Columns You Don’t Need in the Finance Planner for Creatives

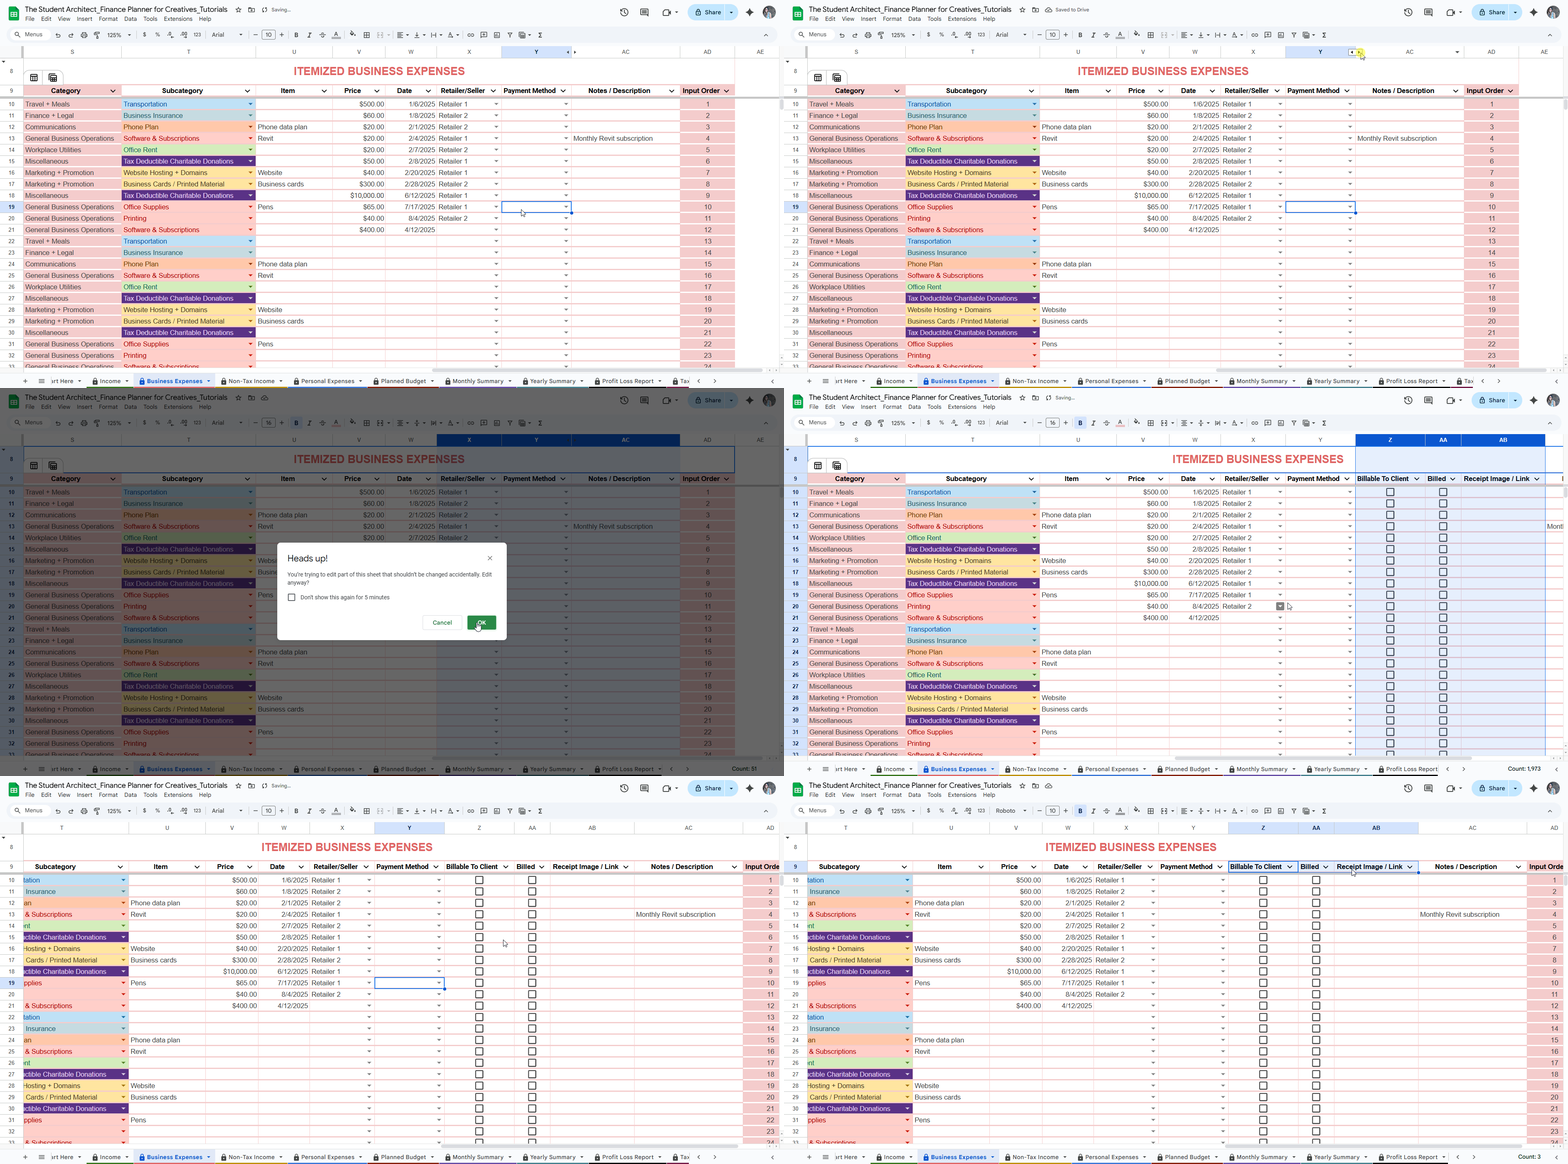
If certain columns aren’t relevant to how you use the Finance Planner for Creatives—like Billable to Client or Billed on the Business Expenses sheet, or Payment Method on any Income or Expense sheet—you can easily hide them to simplify your view.


✅ To hide a column (or multiple columns):

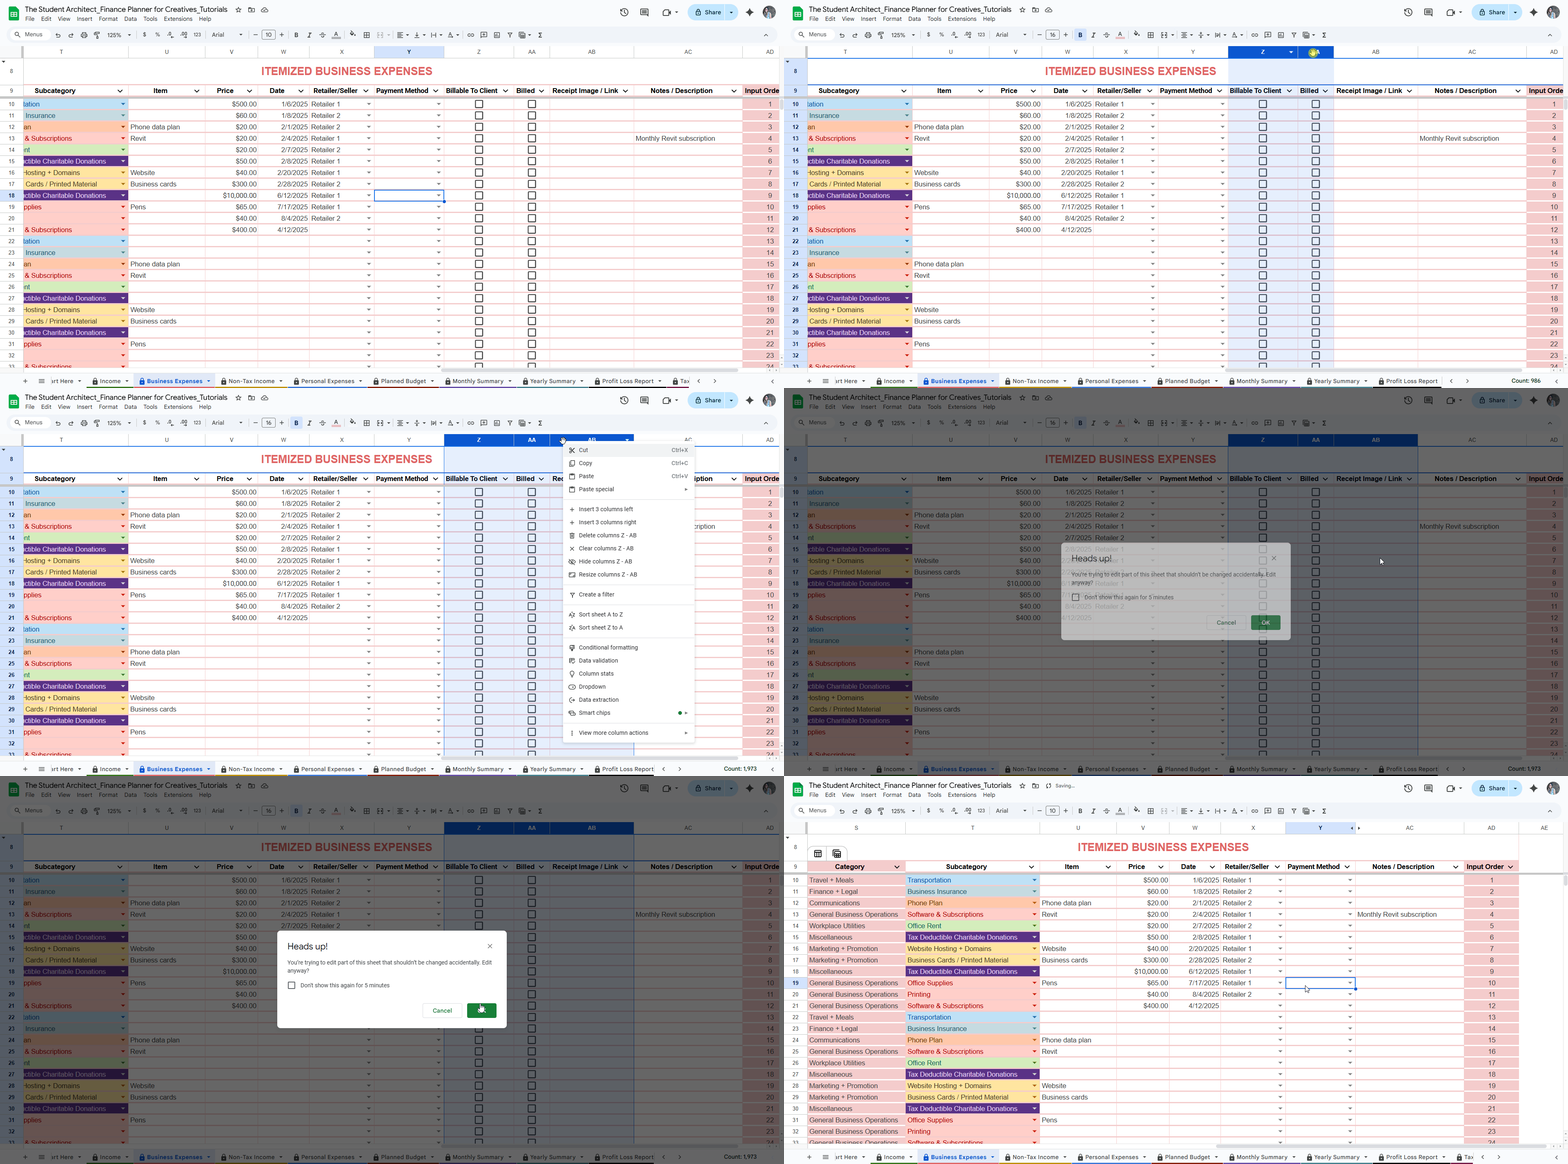
  1. Right-click on the column letter at the top or click the down arrow to the right of the column letter (e.g., column L)

  2. Select "Hide column."

  3. To hide multiple at once, click and drag across the letters of the columns you want to hide, then right-click and choose "Hide columns X–Y."


🔍 To unhide a column:

  1. Look for the small arrow icon that appears between column letters (e.g., between K and M if L is hidden).

  2. Click the arrow to unhide the column.

💡 Hiding a column doesn't delete its data—it simply removes it from view. This is great for customizing your workflow while keeping everything intact.


⚠️ Important Warning:

If you hide a column that contains formulas—such as the Category column on an Income or Expense sheet—and then drag-select the full table to clear data, any hidden cells will also be cleared, even if you can’t see them.

To avoid this:
Clear the cells in sections around the formula columns or cells, and you can temporarily unhide any formula-based columns first before selecting a large range to clear.

How to Hide or Unhide Instruction Columns or Rows in the Finance Planner for Creatives

All Categories  >  Customizing  >  How to Hide or Unhide Instruction Columns or Rows in the Finance Planner for Creatives


How to Hide or Unhide Instruction Columns or Rows in the Finance Planner for Creatives

Many sheets in the Finance Planner for Creatives include instruction rows or columns to help you understand how to use each section. Once you’re familiar with how things work, you may want to hide these to keep your workspace clean and focused.


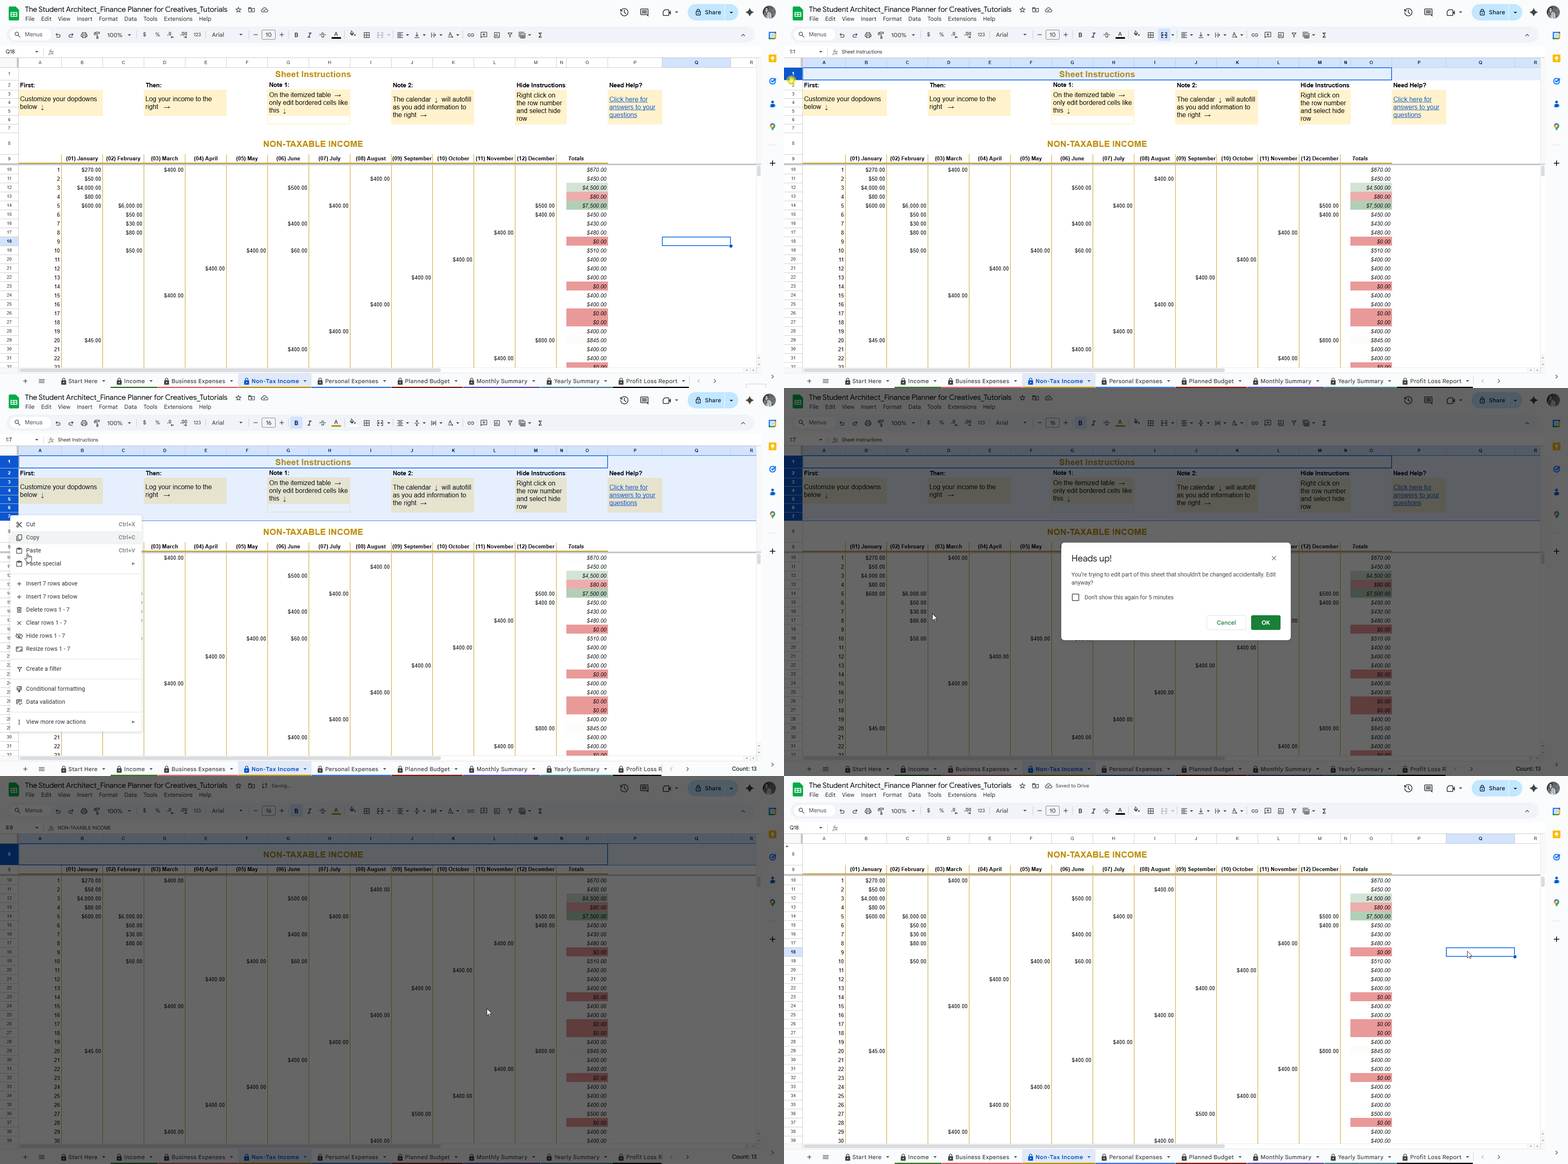
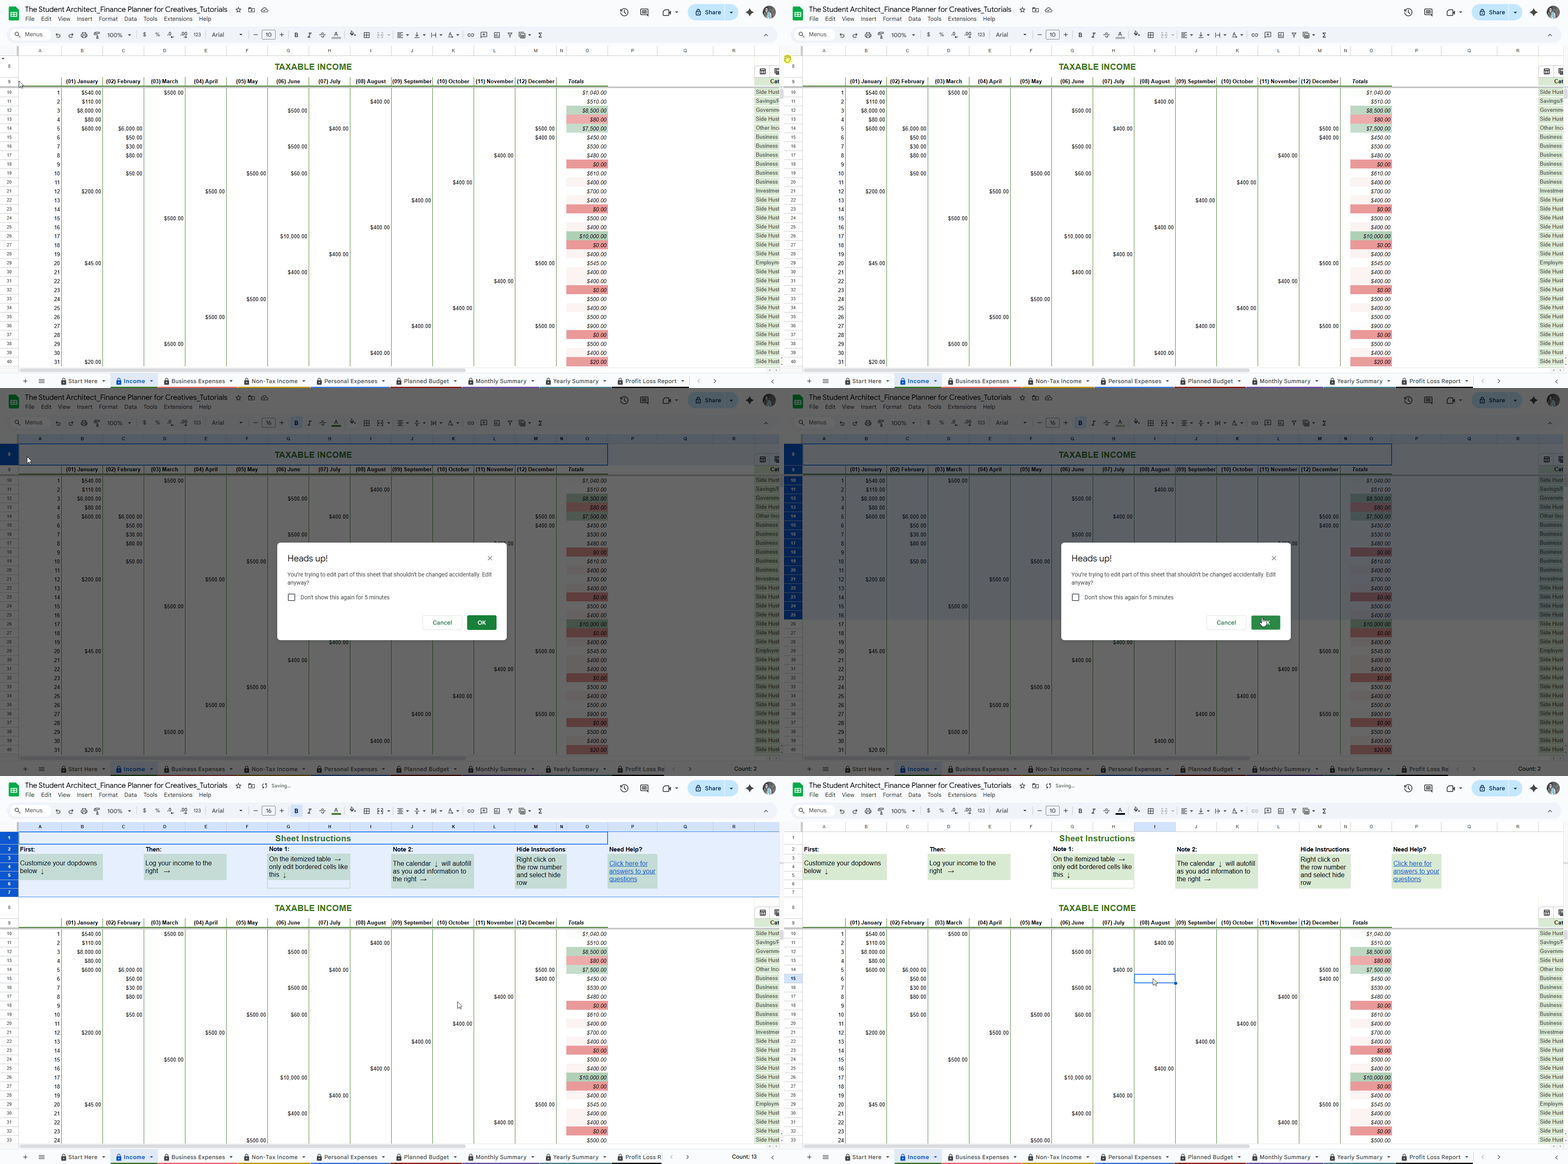
✅ How to hide instruction rows:

  1. Click the row number on the far left (e.g., row 1).

  2. Right-click and select "Hide row."


How to Hide Multiple Rows at Once

To hide a group of consecutive rows:

  • Click and drag across the row numbers on the left to select them

  • Then, right-click and choose “Hide rows”

To hide rows that aren’t next to each other:

  • Hold Ctrl (or Cmd on Mac), then click each individual row number you want to hide

  • Right-click one of the selected rows and choose “Hide rows”

To quickly select a range of rows between two points:

  • Click the first row number

  • Hold Shift, then click the last row number in the range

  • Right-click and choose “Hide rows”


✅ How to hide instruction columns:

  1. Click the column letter at the top (e.g., column A).

  2. Right-click and select "Hide column."


How to Hide Multiple Columns at Once

To hide a group of consecutive columns:

  • Click and drag across the column letters on the top to select them

  • Then, right-click and choose “Hide columns”

To hide columns that aren’t next to each other:

  • Hold Ctrl (or Cmd on Mac), then click each individual column letter you want to hide

  • Right-click one of the selected columns and choose “Hide columns”

To quickly select a range of columns between two points:

  • Click the first column letter

  • Hold Shift, then click the last column letter in the range

  • Right-click and choose “Hide columns”


🔍 How to unhide hidden rows or columns:

  • Look for the small arrow icon between rows or columns—click it to reveal hidden content.


💡 Tips:

  • You may see a popup warning when hiding or unhiding rows and columns. This warning can safely be ignored in this case. See more on popup warnings here  →

  • Hiding instruction rows or columns can be helpful, but if you select an entire area (including hidden rows or columns) and try to clear it, you may accidentally delete hidden instructions or formulas.
    Always double-check your selection before clearing data. See more on cells you should edit and how to safely clear data.

How to Change Dropdown Type and Option Colors in the Finance Planner for Creatives

All Categories  >  Customizing  >  How to Change Dropdown Type and Option Colors in the Finance Planner for Creatives


How to Change Dropdown Type and Option Colors in the Finance Planner for Creatives

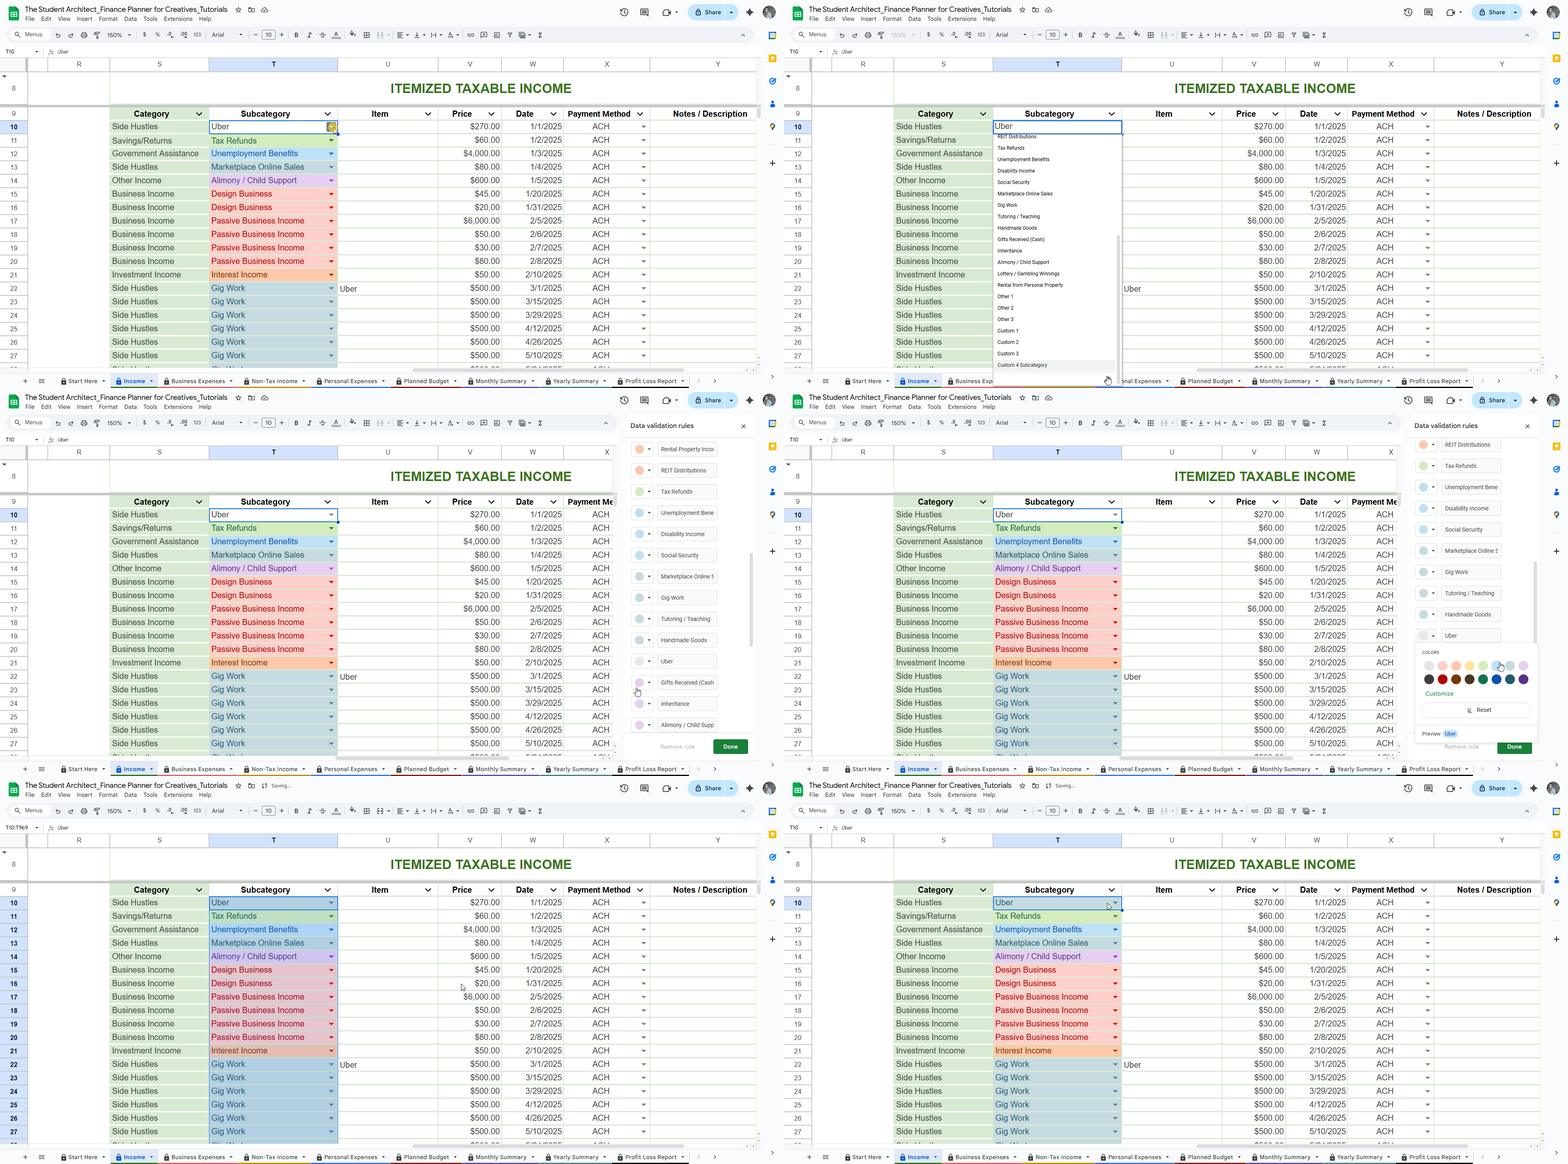
Many sheets in the Finance Planner for Creatives use dropdowns to make data entry quicker and more consistent. You can customize both the dropdown type and the colors of the dropdown options to better suit your workflow and highlight important info at a glance. Once you know how to adjust these settings, you can make the planner feel more intuitive, organized, and personalized to your needs.


🔽 Dropdown Style Options:

You can change how your dropdowns appear in cells depending on your preferences:

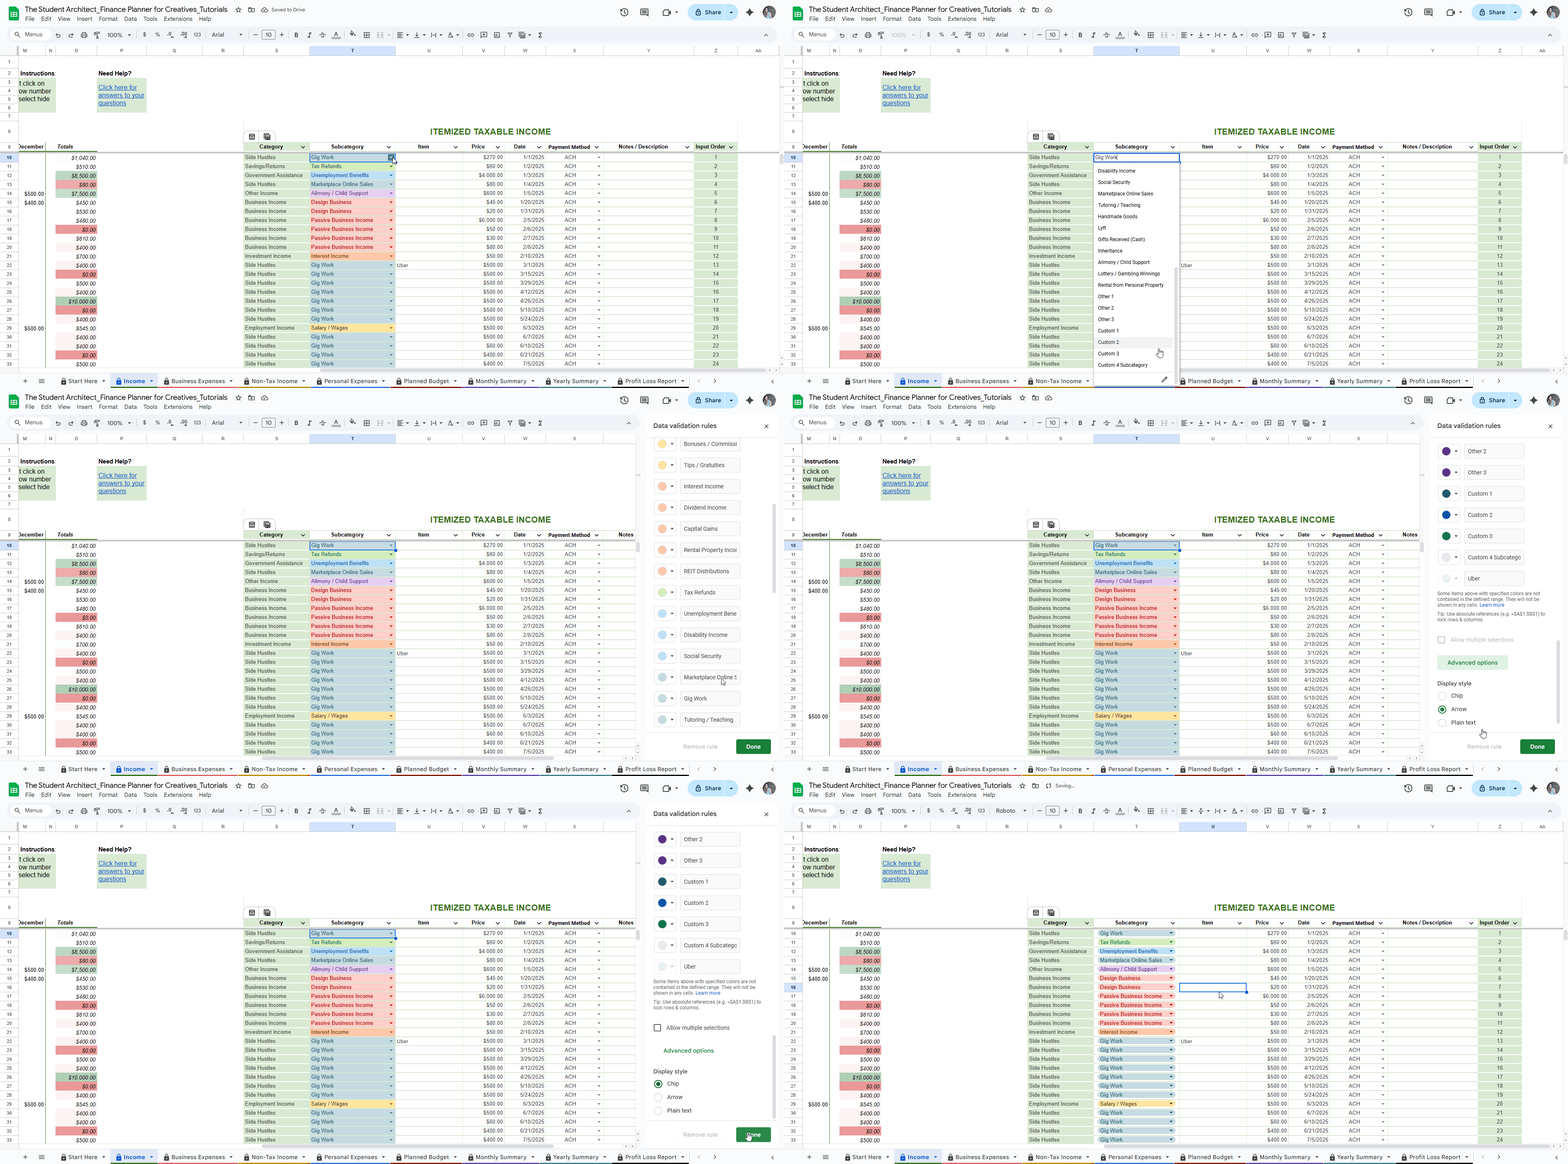
  • Arrow icon: Shows a dropdown arrow in the cell (the most common option)

  • Blank cell: Hides the dropdown arrow but keeps the dropdown active

  • Chip-style: Shows selected options as colored labels (helpful for visibility)

⚙️ To change the dropdown style:

  1. Double click the dropdown cell

  2. Scroll to the bottom of the dropdown list and click the Edit Button at the bottom right.

  3. In the side panel, scroll to down and click Advanced Options

  4. Choose your preference

  5. Click Done


🎨 Color-Coding Dropdown Options:

  • Each option in the dropdown list can be assigned a color using conditional formatting or dropdown chip styling

Follow steps 1 and 2 above or see how here →


✏️ Note on New or Edited Options:

  • When you add or edit options in the dropdown lists, they may appear grey by default

  • You can update their color using the steps above

💡 Tip: Keeping colors consistent (such as by category) helps visually group related items on the income and expense sheets.

How to Show Alternating Colors on Tables in the Finance Planner for Creatives

All Categories  >  Customizing  >  How to Show Alternating Colors on Tables in the Finance Planner for Creatives


How to Show Alternating Colors on Tables in the Finance Planner for Creatives

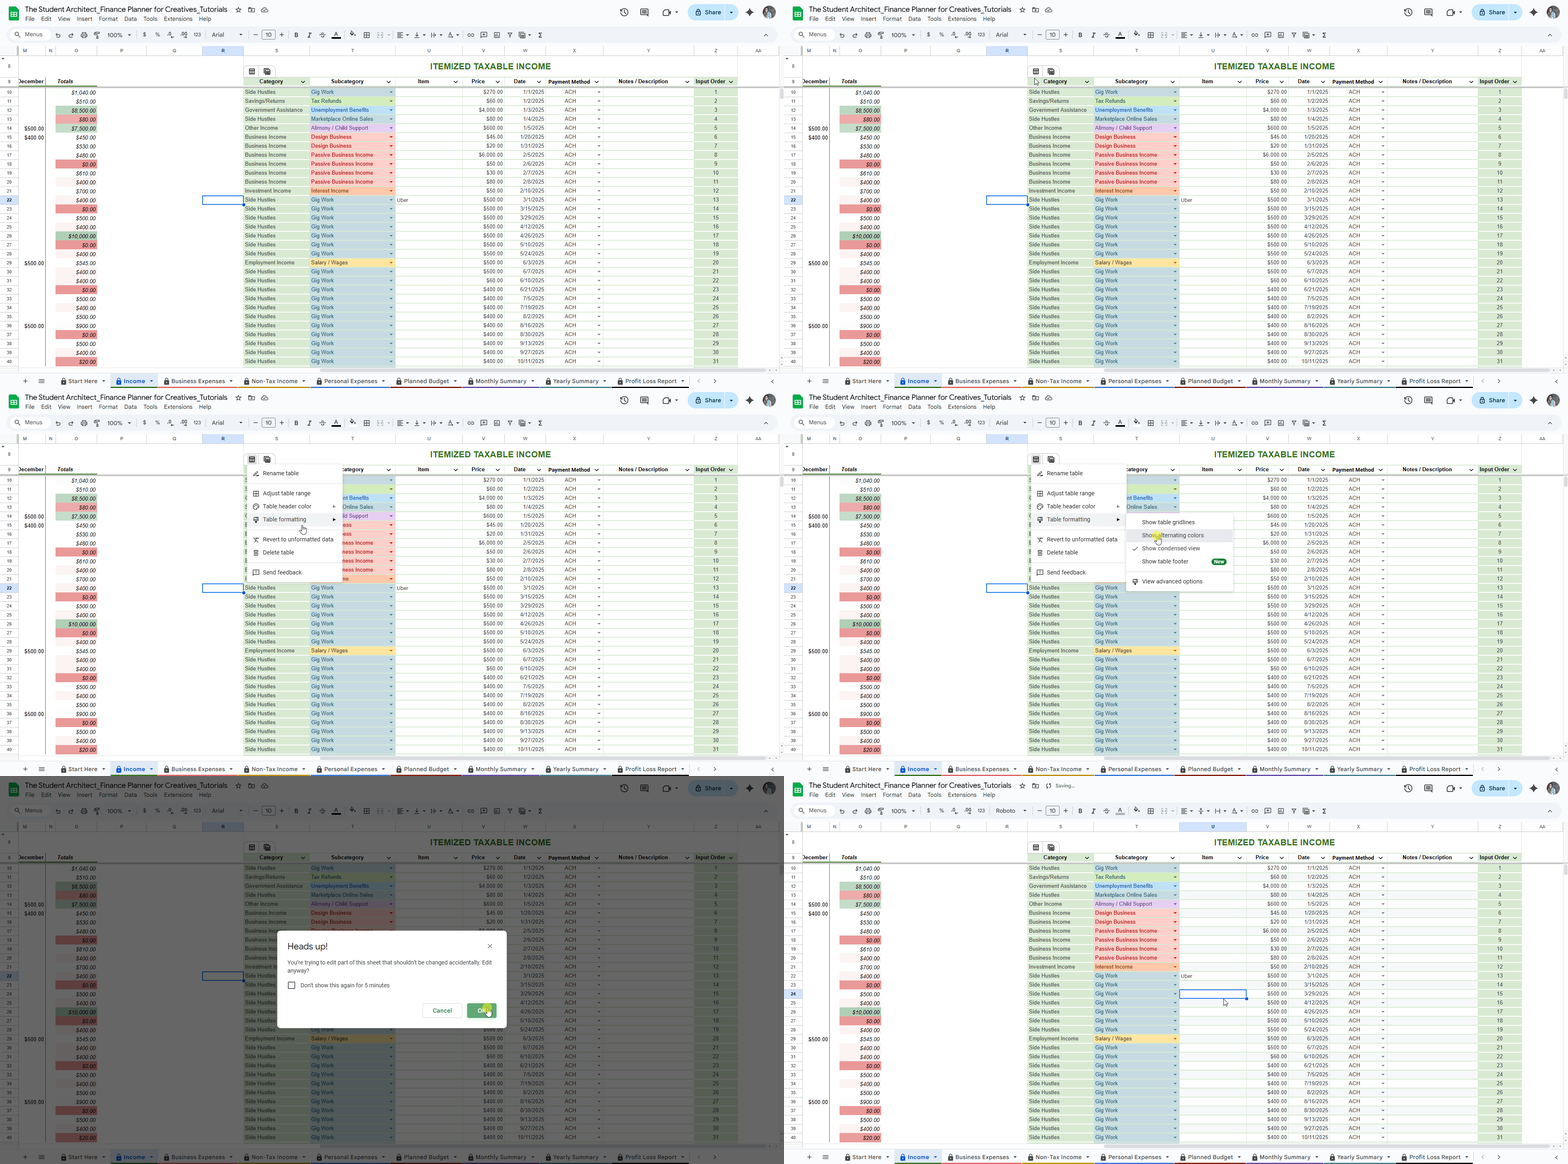
Want to make your income and expense logs easier to scan in the Finance Planner for Creatives? You can turn on alternating row colors for better readability—especially helpful for longer tables.


✅ To apply alternating colors:

  1. Hover over the top-left corner of the table. You’ll see two icons appear.

  2. Click the left-most icon.

  3. From the dropdown, choose Table FormattingShow Alternating Colors.

  4. For more options, select View Advanced Options to:

    • Customize your color palette

    • Adjust banding style

💡 Tips:

  • Alternating colors are just for looks—they won’t affect formulas, data, or dropdowns.

  • This works great on the Income and Expense Logs, where you’re regularly reviewing and entering data across many rows.


⚠️ Heads up:
A warning might pop up when applying formatting—you can safely ignore it if you're just adjusting colors. Nothing will be overwritten as long as you don’t edit or delete shaded or protected cells. See more on popup warnings here  →

How to Filter Tables in the Finance Planner for Creatives

All Categories  >  Customizing  >  How to Filter Tables in the Finance Planner for Creatives


How to Filter Tables (Like Income + Expense Logs) in the Finance Planner for Creatives

Want to view only certain entries—like a specific category, date range, or payment method in the Finance Planner for Creatives? Filtering helps you focus on the data you need without deleting anything.


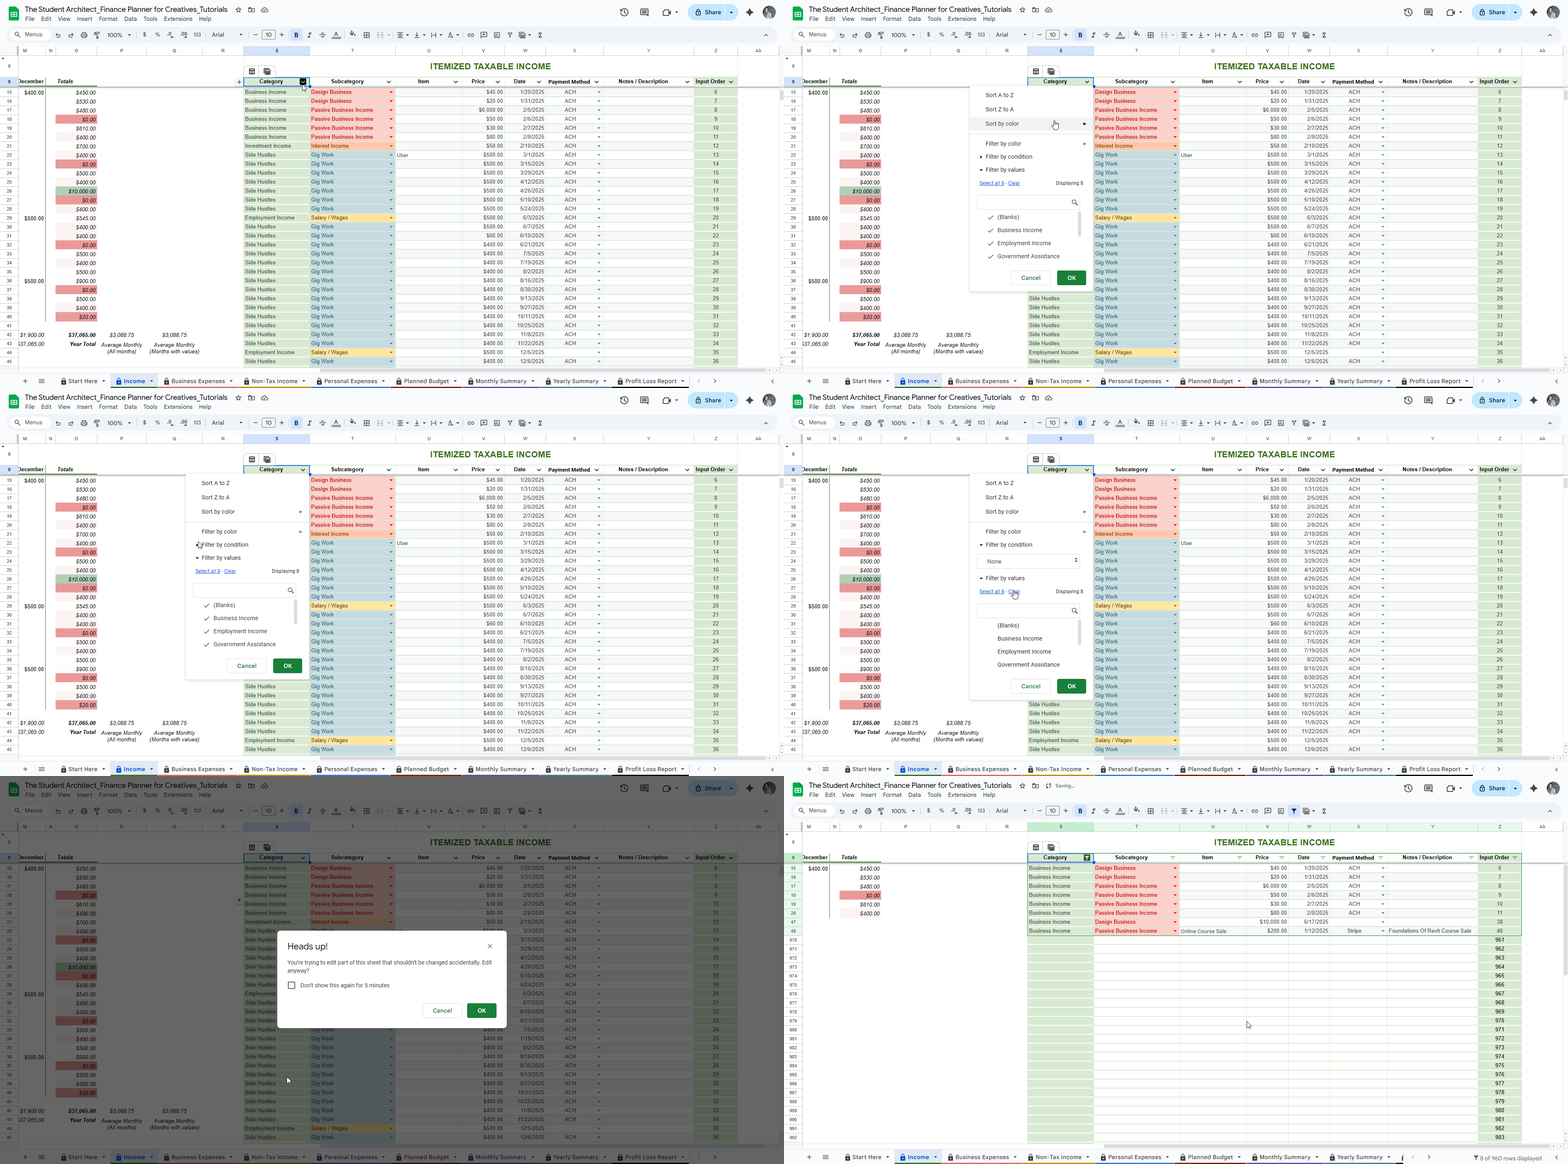
✅ How to filter a table:

  1. Find the table you want to filter.

  2. Click on the down arrow (▼) at the header in the column you want to filter by.

  3. Click Filter Column and choose one or more filter option(s):

    • Filter by color

      • Choose a color option

    • Filter by condition

      • Choose condition

    • Filter by values

      • Choose values to display

💡 Use filters to:

  • Review income or expenses for a specific category

  • Check transactions from a certain time period

  • Troubleshoot entries with missing info

  • Isolate duplicate entries

  • Make recurring entries easier - see more on this here  →


⚠️ Warning:
You’ll likely see a warning popup when applying filters—you can safely ignore this as long as you're only filtering. Filtering doesn’t delete or change data, it only hides what doesn’t match the filter. See more on popup warnings here  →


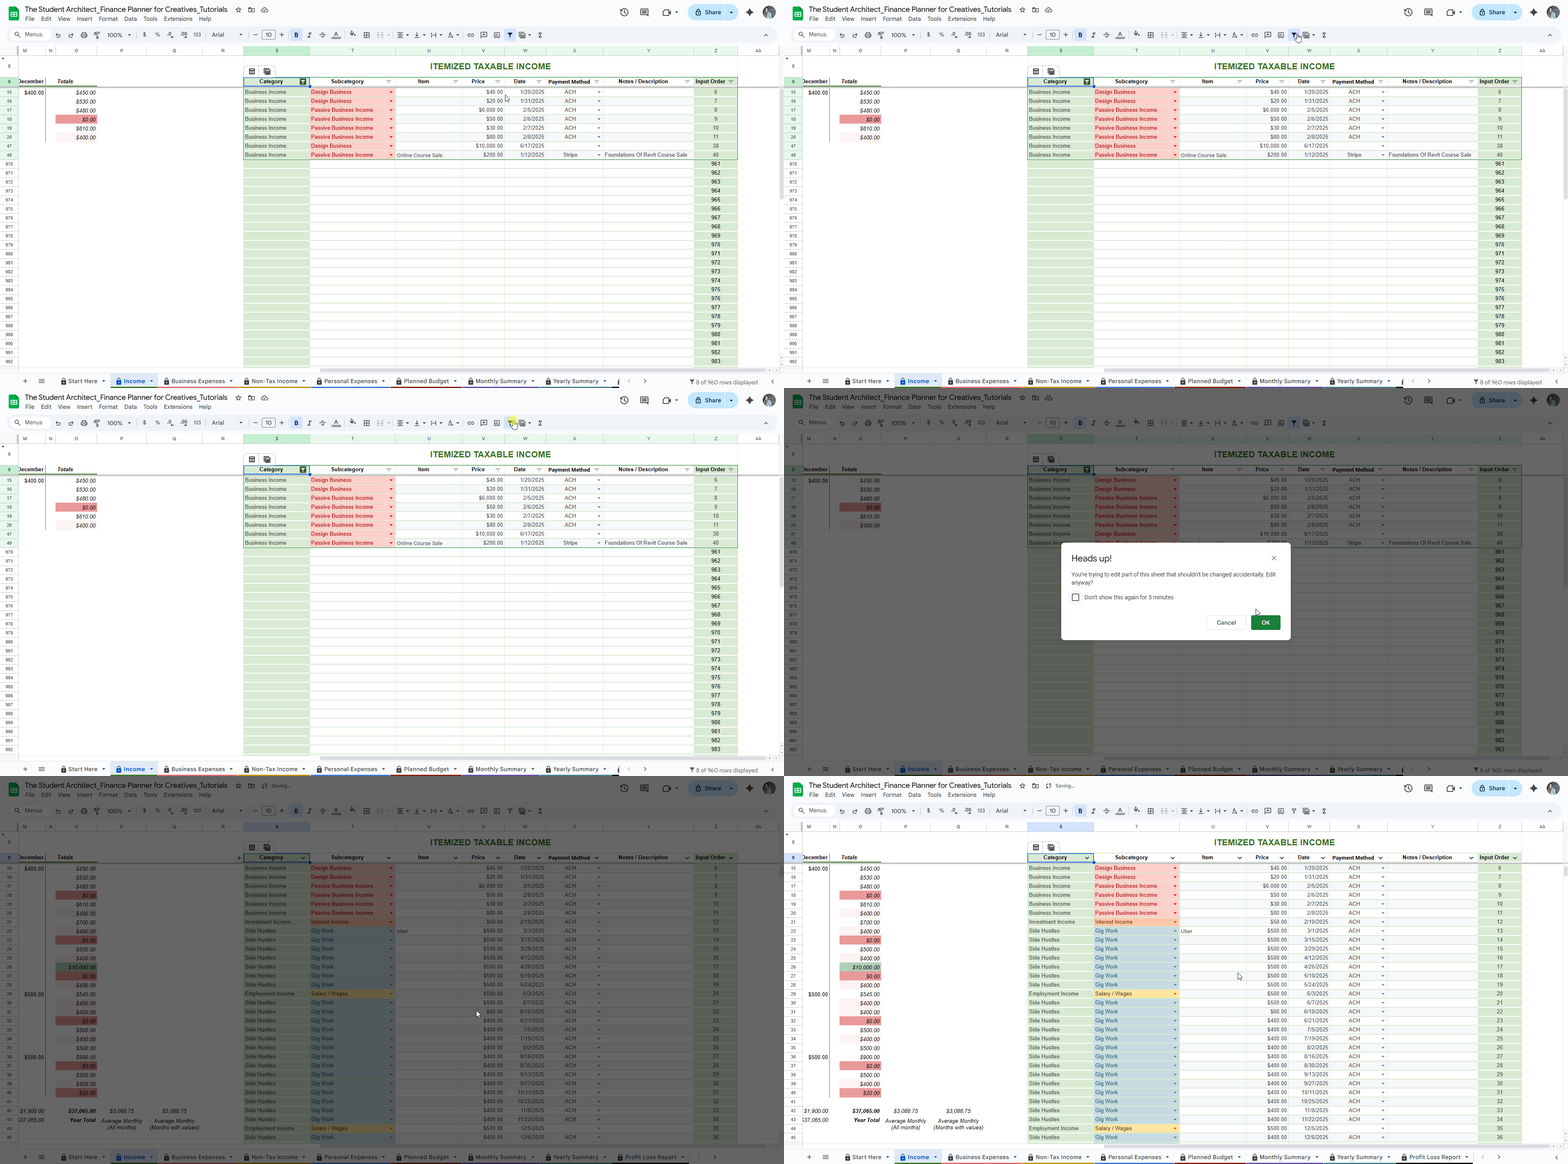
🔄 How to Remove Filters:

  • Go to the Ribbon and click the Filter icon

  • Or go to Data → Remove filter

How to Sort Tables in the Finance Planner for Creatives

All Categories  >  Customizing  >  How to Sort Tables in the Finance Planner for Creatives


How to Sort Tables (Like Income + Expense Logs) in the Finance Planner for Creatives

Need to organize your data by date, amount, category, or any other column in the Finance Planner for Creatives? Sorting helps you quickly make sense of your transactions.


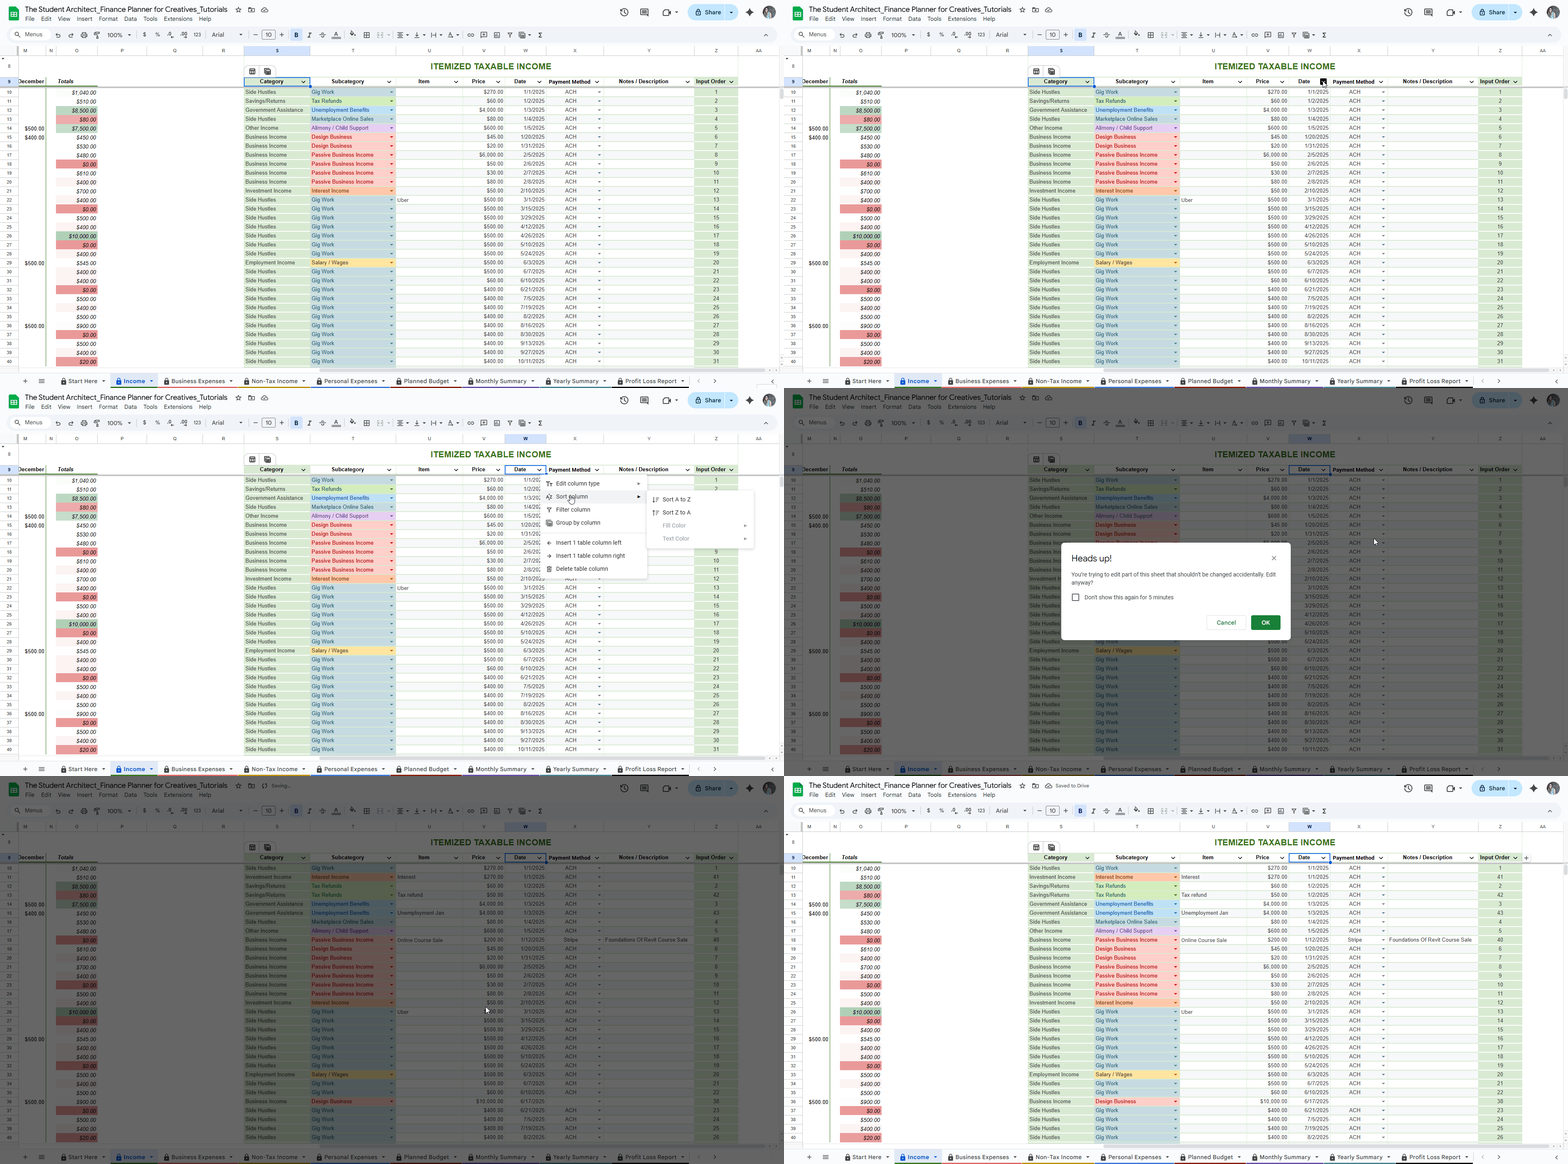
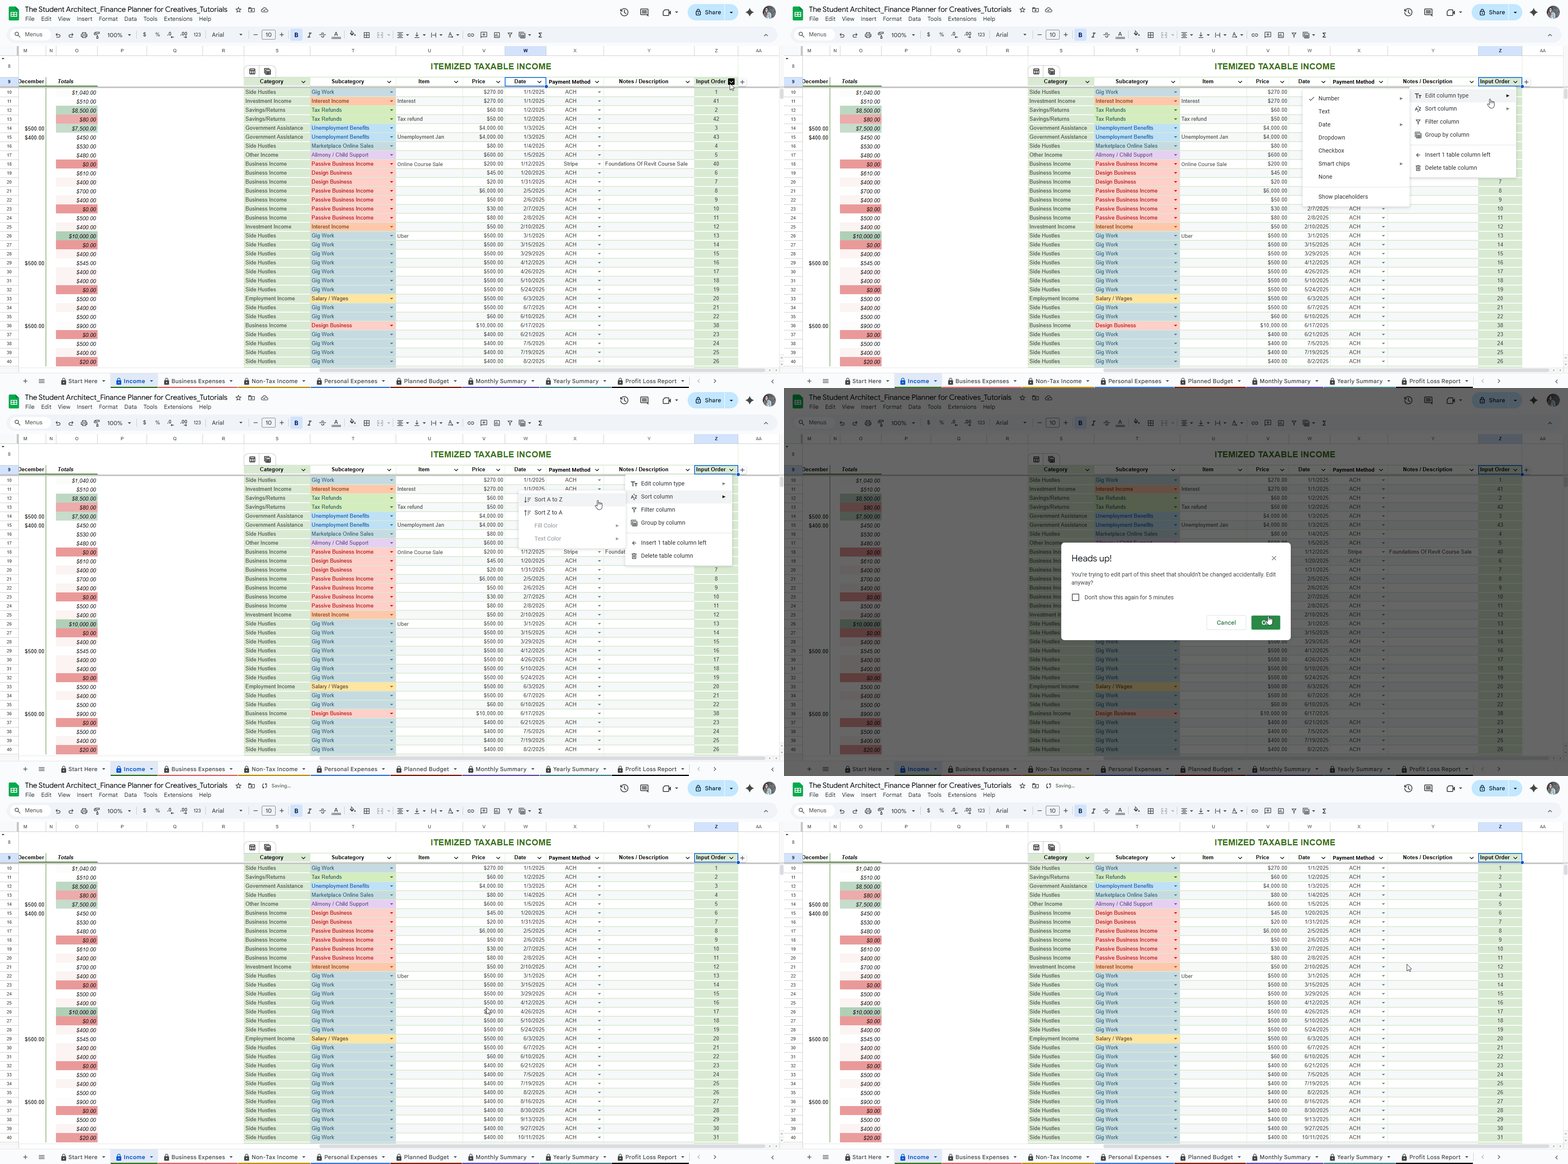
✅ How to sort a table:

  1. Find the table you want to sort.

  2. Click the down arrow (▼) in the column you want to sort.

  3. Go to Sort Column and choose:

    • Sort A → Z for ascending (e.g., oldest to newest, lowest to highest)

    • Sort Z → A for descending (e.g., newest to oldest, highest to lowest)

💡 Common ways to sort:

  • By Date to review your finances chronologically

  • By Price to spot large transactions

  • By Category or Subcategory to group like entries together


⚠️ Warnings:

  1. You may see a popup about editing in a protected range or changing cell content — you can safely ignore this if you're only sorting a table. See more on popup warnings here  →

  2. Sorting is not permanent, but there’s no “remove sort” button. To establish your original order before sorting, you can:

    • Create a manual sorting system by adding a column with numbered rows (like 1 to 1000). This way, you can always sort by that column to return to your original input order.


🔁 How to Undo Sorting:

  • You can remove the sort using the undo button (Ctrl+Z)

  • Sort by a manual sorting system you can create before sorting using the steps described above