All Categories > Customizing > How to Filter Tables in the Finance Planner for Creatives
How to Filter Tables (Like Income + Expense Logs) in the Finance Planner for Creatives
Want to view only certain entries—like a specific category, date range, or payment method in the Finance Planner for Creatives? Filtering helps you focus on the data you need without deleting anything.
✅ How to filter a table:
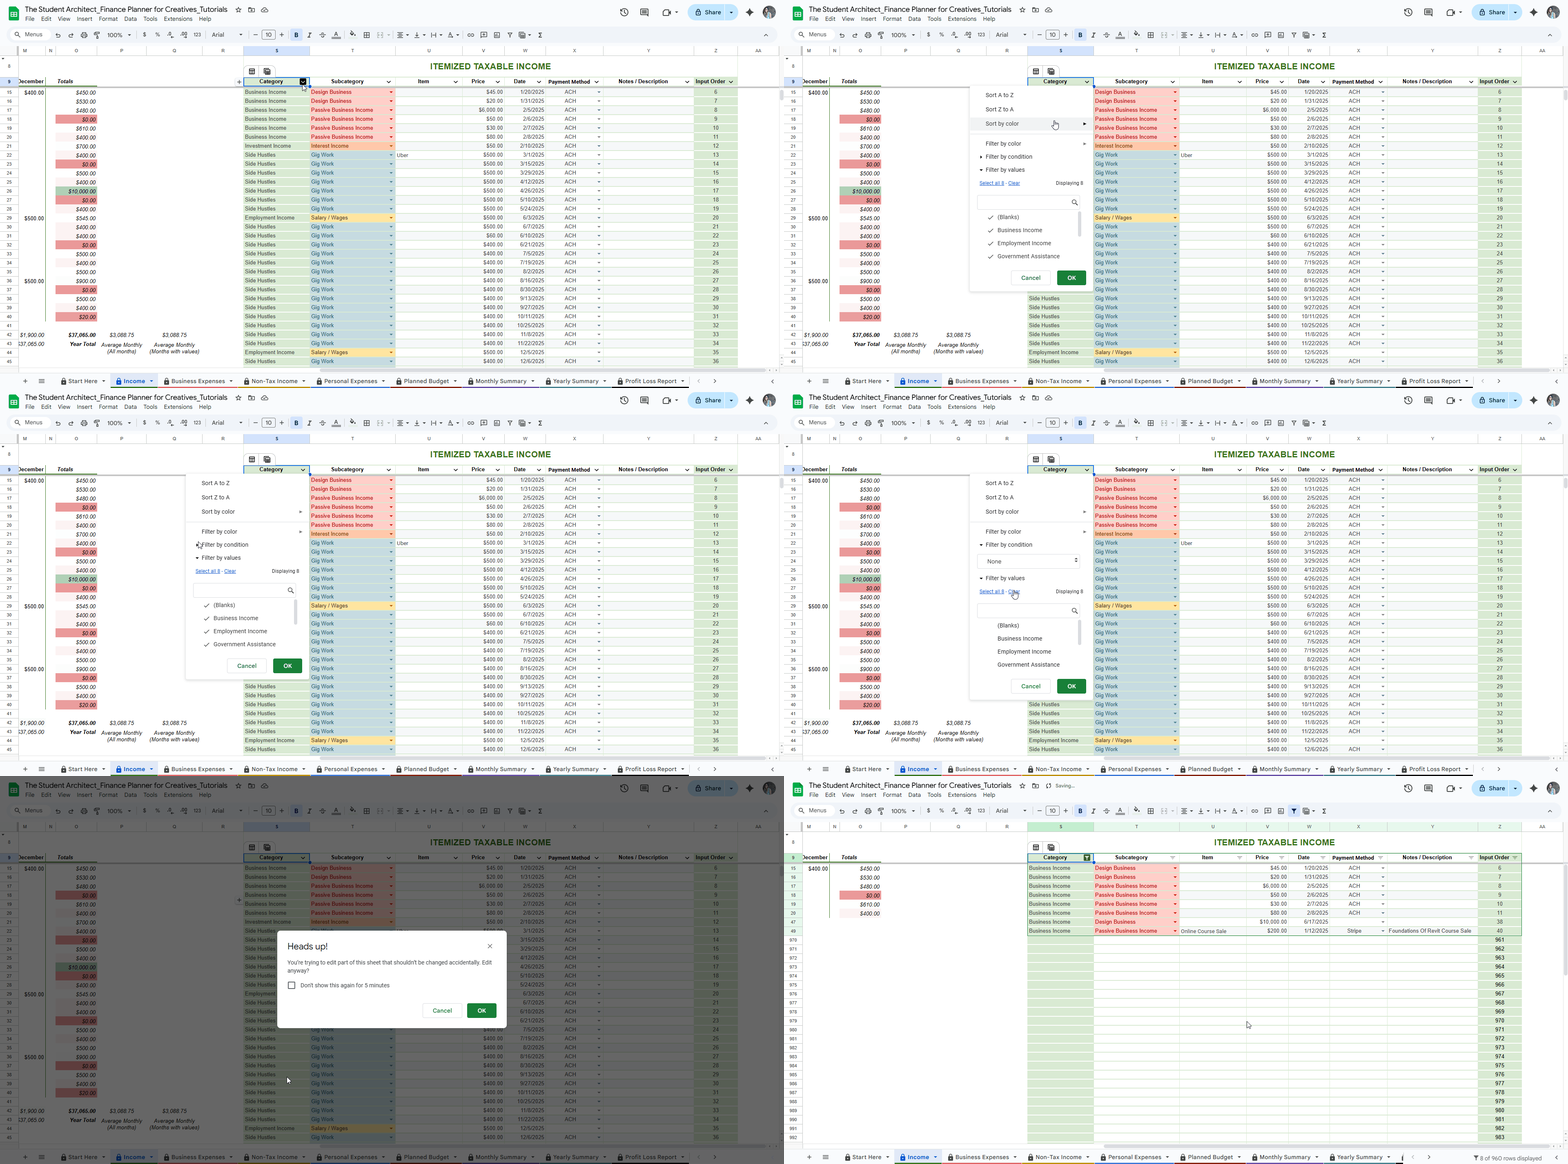
Find the table you want to filter.
Click on the down arrow (▼) at the header in the column you want to filter by.
Click Filter Column and choose one or more filter option(s):
Filter by color
Choose a color option
Filter by condition
Choose condition
Filter by values
Choose values to display
💡 Use filters to:
Review income or expenses for a specific category
Check transactions from a certain time period
Troubleshoot entries with missing info
Isolate duplicate entries
Make recurring entries easier - see more on this here →
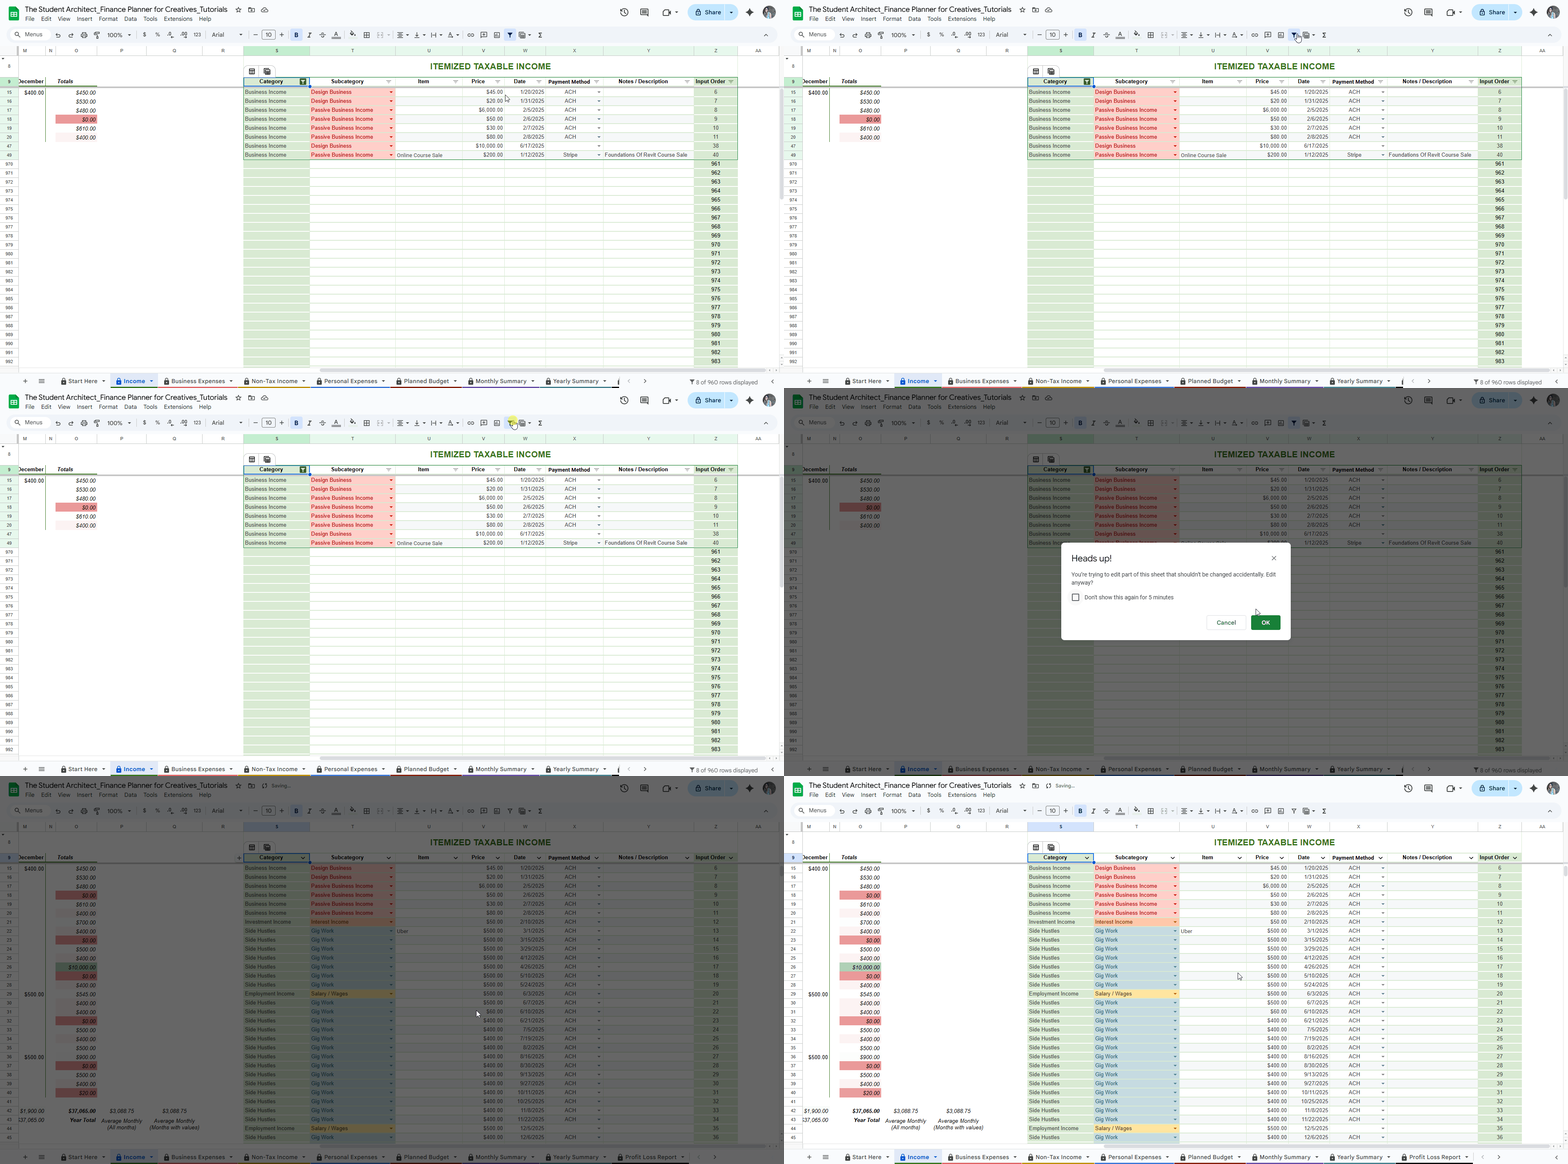
🔄 How to Remove Filters:
Go to the Ribbon and click the Filter icon
Or go to Data → Remove filter
⚠️ Warning:
You’ll likely see a warning popup when applying filters—you can safely ignore this as long as you're only filtering. Filtering doesn’t delete or change data, it only hides what doesn’t match the filter. See more on popup warnings here →


