All Categories > Tracking Income + Expenses > How to Log Income in the Finance Planner for Creatives
How to Log Income in the Finance Planner for Creatives
Whether you're tracking freelance payments, day job wages, or other earnings, the income sheets in your Finance Planner for Creatives make it easy to keep it all organized and visualized.
Each entry you add powers your summaries, charts, and tax tools, etc. — so the more accurate your inputs, the more helpful your insights!
✅ Required Fields
These are the must-fill items for each income entry for calculations and charts:
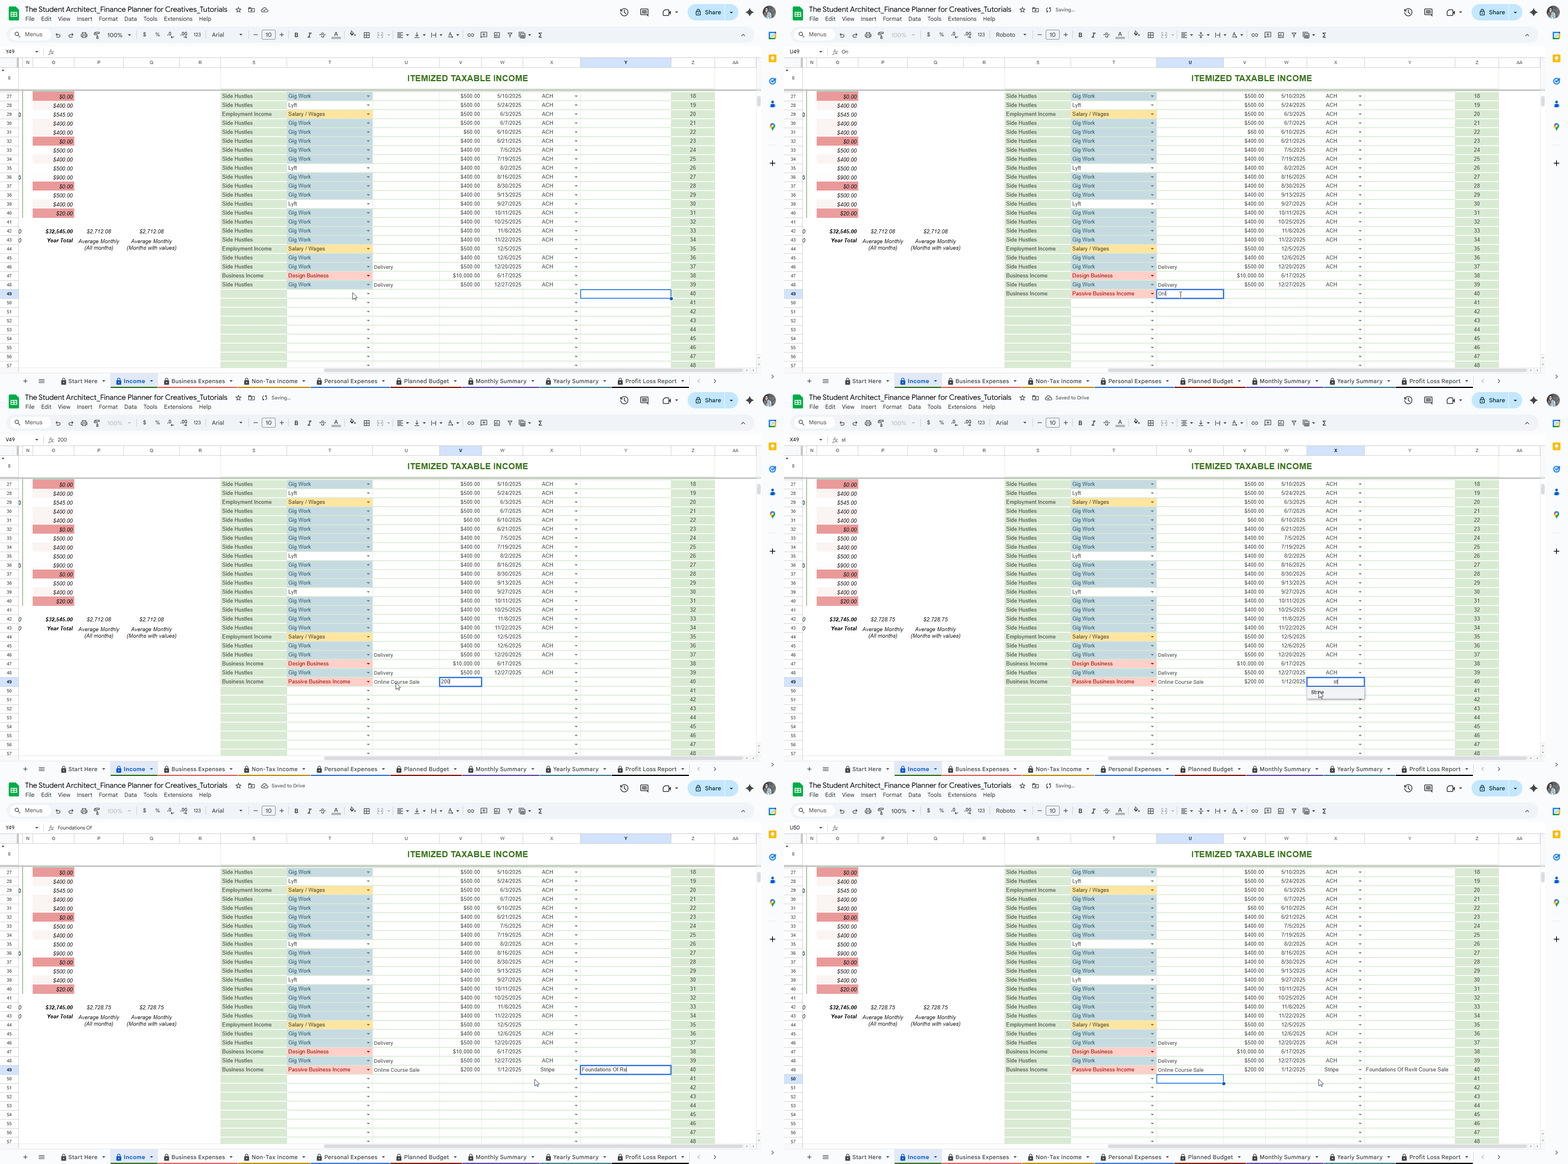
Subcategory
Choose the specific income type (e.g., Client Payment, Etsy Sales, Grants).💡 Tip: The matching Category will auto-fill based on your dropdown setup.
Item (short description)
A quick label like “Logo Design for Alex” or “November Etsy Sales.”Note: The Item column is only required for duplicate entry detection
Price
Enter the income amount received (before any taxes or deductions).Date
Use the actual date the income was received or deposited — this is used to generate your calendar views and summaries.
✨ Optional Fields
These fields help you add more context or track details you might want to reference later:
Payment Method
Select how you were paid—for example, Venmo, Bank Transfer, or Check.Notes / Description
Use this space for longer details or notes—like payment details, client notes, etc.
How to log an income entry
🔁 How to Easily Duplicate Entries in the Income Log
Have recurring income from the same client, project, or platform? Instead of re-entering all the details every time, here’s how to quickly duplicate a past entry:
Filter by Subcategory or Other Relevant Metric (Optional):
Use the dropdown filters to narrow your view to a specific income subcategory—like “Freelance Earnings” or “Digital Products”—so you can quickly find the entry you want to copy. See more here on filtering tables →Find the Entry You Want to Duplicate:
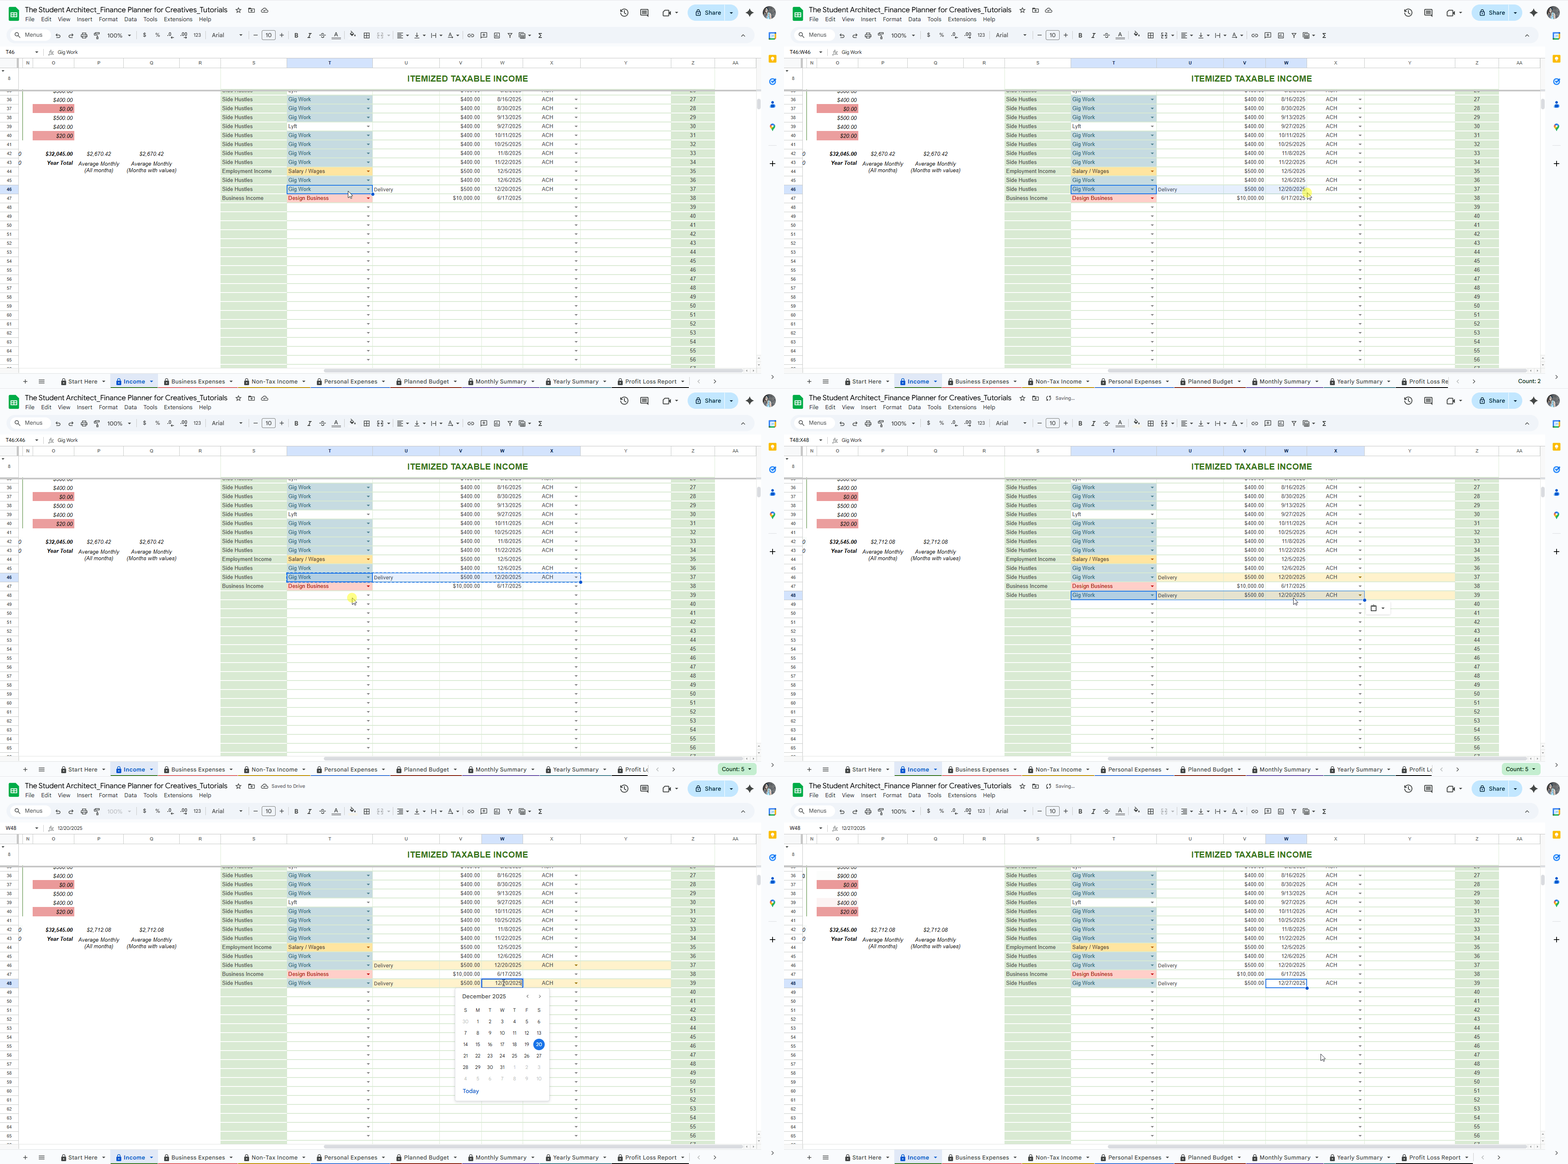
Scroll to the row that has the details you want to reuse (item, subcategory, description, amount, etc.).Copy and Paste to a New Row:
Select the bordered cells in the row you want to copy (avoid the shaded cells)
Use
Ctrl+C(Windows) orCmd+C(Mac) to copy.Scroll to the next empty row at the bottom of the log.
Select the first cell of that row in the table and paste with
Ctrl+VorCmd+V.Repeat these steps for the cells on the other side of the shaded column.
Update the Details:
Don’t forget to update the date, item, amount, or any other fields that might change. (This is especially helpful for monthly retainers or repeat product sales.)
How to duplicate income entries
✨ Pro Tip: If you see a yellow row (or two), it means those entries are duplicates—this visual cue helps you quickly spot and avoid accidental double entries.
📌 Things to Keep in Mind
Only edit the bordered cells — shaded areas and formulas update automatically. See more about which cells to edit here →
Customize your dropdowns (like subcategories or payment methods) to match your life — See how to customize your dropdowns here →
Double-check that your subcategory has a corresponding category so that your data charts and insights are calculated correctly.
You can safely clear entries in bulk from the bordered sections when you're ready for a reset. See how.
Looking to enter an expense instead? Check out this logging expenses guide.


