All Categories > Tracking Income + Expenses > How to Log Expenses in the Finance Planner for Creatives
How to Log Expenses in the Finance Planner for Creatives
Tracking your expenses is one of the most powerful habits for gaining control over your finances — and your Finance Planner for Creatives makes it easy to do just that.
Whether it’s a personal purchase or a business investment, each logged expense keeps your charts, summaries, and tax tools accurate and insightful.
✅ Required Fields
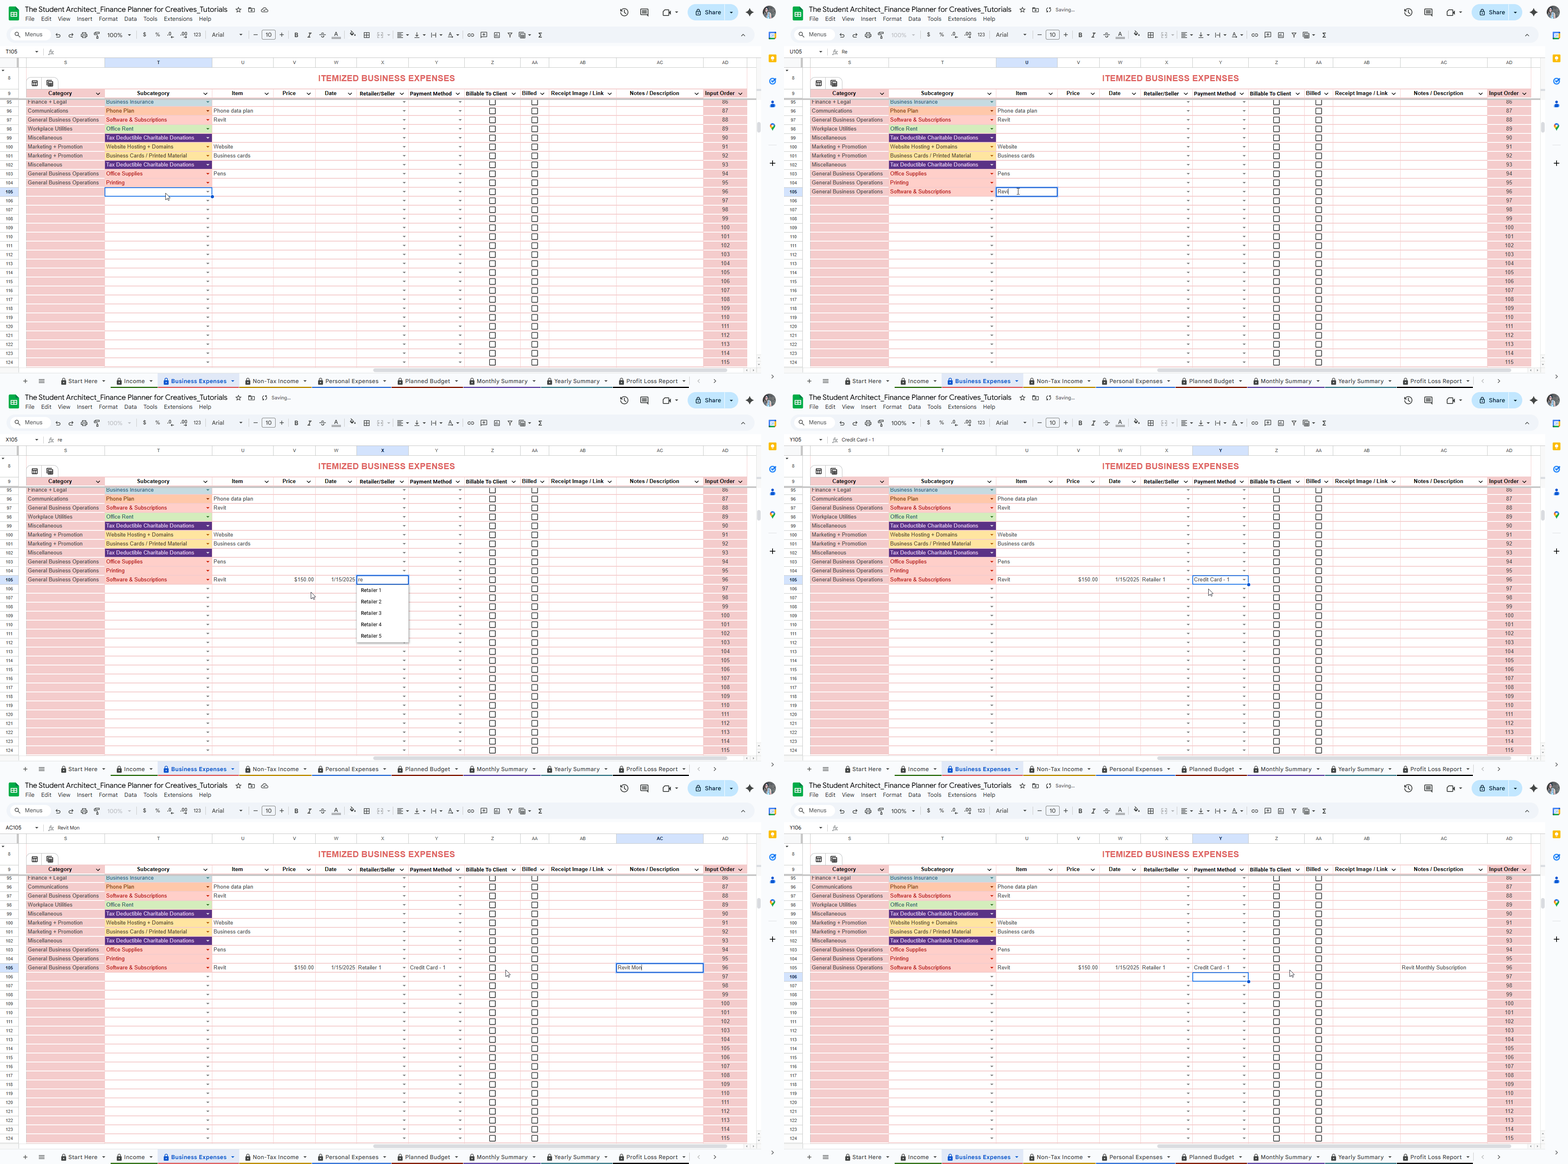
These fields are essential for every expense entry — both personal and business:
Subcategory
Choose the type of expense (e.g., Software, Utilities, Dining Out).💡 Tip: The matching Category will auto-populate based on your dropdown setup.
Price
Enter the amount you spent.Date
Use the actual date of the expense — this powers your calendar view and summaries.
✨ Optional Fields (Both Personal & Business)
These fields help you add context or extra tracking details:
Item (short description)
A quick label like “Canva Pro Subscription” or “Weekly Groceries.”Retailer / Seller
Who you purchased from — Amazon, Target, Staples, etc.Payment Method
How you paid — Chase Credit Card, PayPal, Cash, etc.Notes / Description
Any extra details you want to remember — what the purchase was for, whether it was shared, calculations if only partially tax-deductible, etc.
How to log expenses
🧾 Additional Fields for Business Expenses
If you're logging a business expense, these extra fields can help you track what's reimbursable or deductible:
Billable to Client
Was this expense related to a client project? Select Yes if you plan to invoice for it.Billed
Once you've added the expense to a client invoice, select Yes here to keep track.Receipt (Image or Link)
Paste a link to a cloud-stored image, file, or PDF of the receipt. This helps with bookkeeping and tax documentation.
🔁 How to Easily Duplicate Entries in the Expense Log
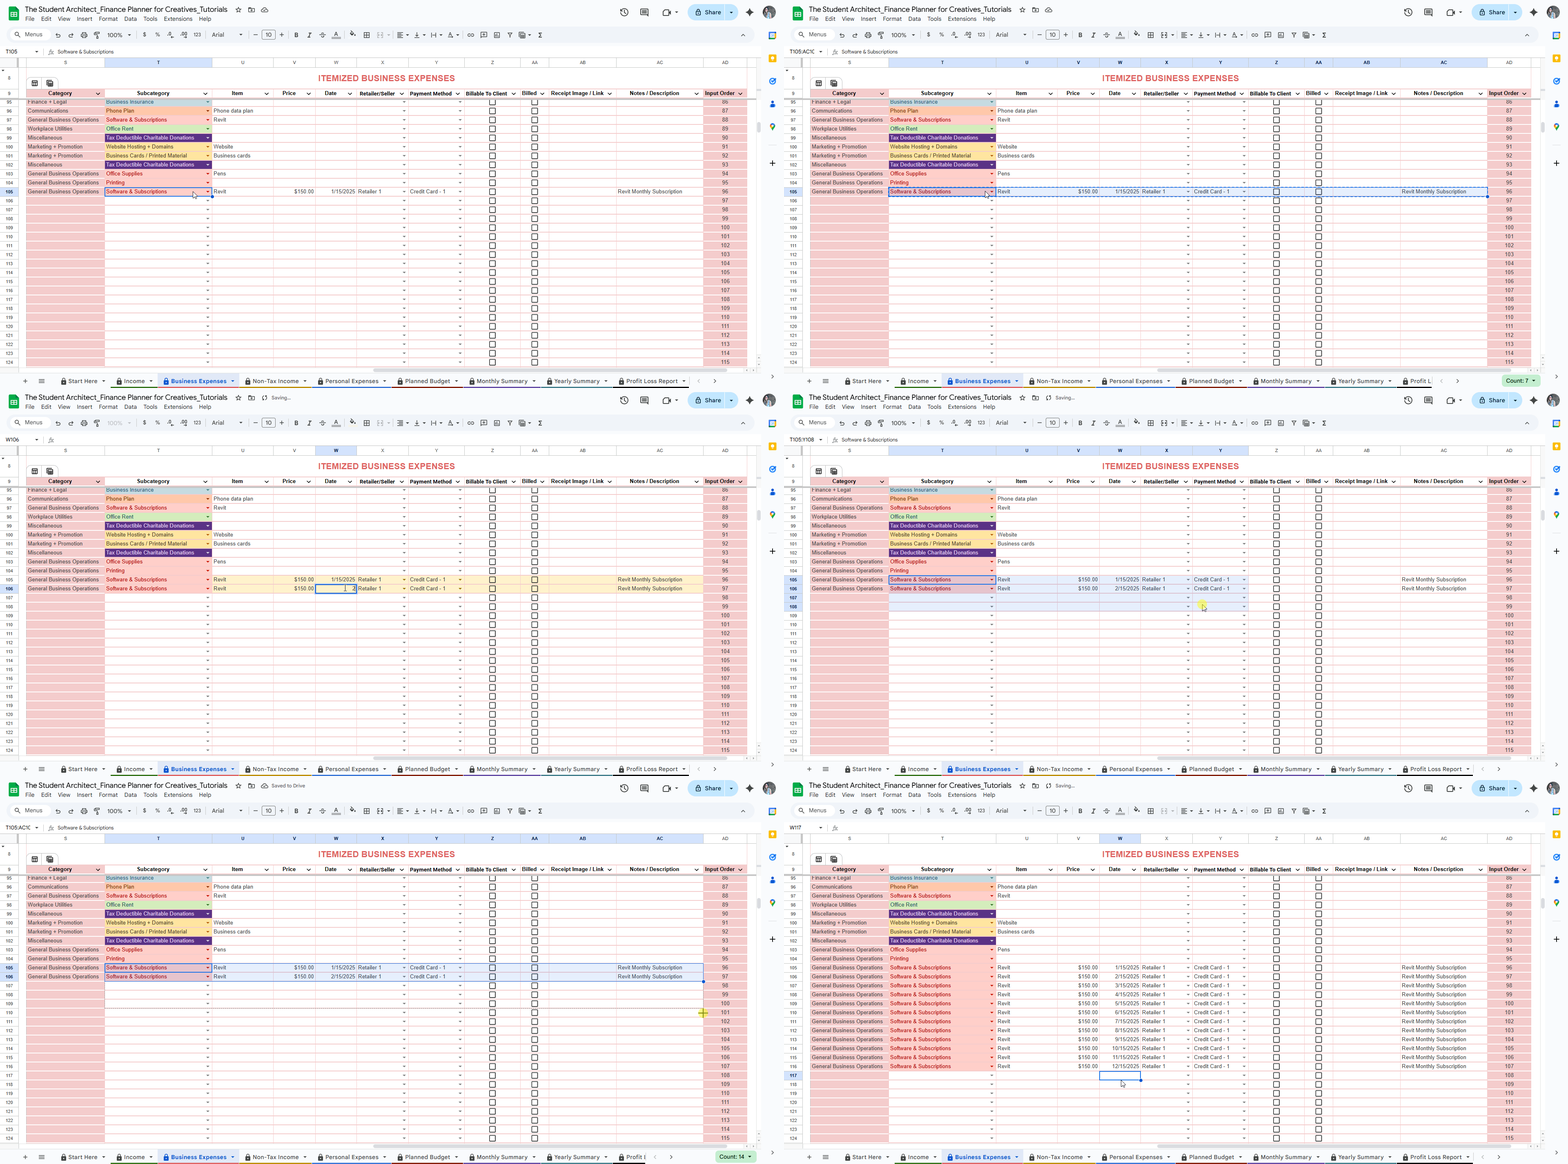
Have recurring personal or business expenses? Instead of re-entering all the details every time, here’s how to quickly duplicate a past entry:
Filter by Subcategory or Other Relevant Metric (Optional):
Use the dropdown filters to narrow your view to a specific expense subcategory—like “Groceries” or “Subscription”—so you can quickly find the entry you want to copy. See more here on filtering tables →Find the Entry You Want to Duplicate:
Scroll to the row that has the details you want to reuse (item, subcategory, description, amount, etc.).Copy and Paste to a New Row:
Select the bordered cells in the row you want to copy (avoid the shaded cells)
Use
Ctrl+C(Windows) orCmd+C(Mac) to copy.Scroll to the next empty row at the bottom of the log.
Select the first cell of that row in the table and paste with
Ctrl+VorCmd+V.Repeat these steps for the cells on the other side of the shaded column.
Update the Details:
Don’t forget to update the date, description, amount, or any other fields that might change. (This is especially helpful for monthly software subscriptions and other regular purchases)
How to duplicate single entries and create new entries for recurring expenses
✨ Pro Tip: If you see a yellow row (or two), it means those entries are duplicates—this visual cue helps you quickly spot and avoid accidental double entries.
📌 Things to Keep in Mind
Only edit the bordered cells — shaded areas and formulas update automatically. See more about which cells to edit here →
Customize your dropdowns (like retailers or payment methods) to match your life — see how.
Double-check that your subcategory has a corresponding category so that your data charts and insights are calculated correctly.
You can safely clear entries in bulk from the bordered sections when you're ready for a reset. See how.
Looking to enter income instead? Check out this logging income guide.


