Terms of Use for the Finance Planner for Creatives

All Categories  >  Terms + Things  >  Terms of Use for the Finance Planner for Creatives


Terms of Use for the Finance Planner for Creatives

What you agree to when you purchase and use the Finance Planner for Creatives


These Terms of Use ("Terms") govern your purchase and use of the Finance Planner for Creatives ("Product") provided by Chelsea Weibust dba The Student Architect ("I", "me", or "the Creator"). By purchasing, downloading, or using this Product, you agree to these Terms.

Please read them carefully.

1. License and Use

  • You are granted a personal, non-exclusive, non-transferable license to use the Product for your own personal or business financial planning.

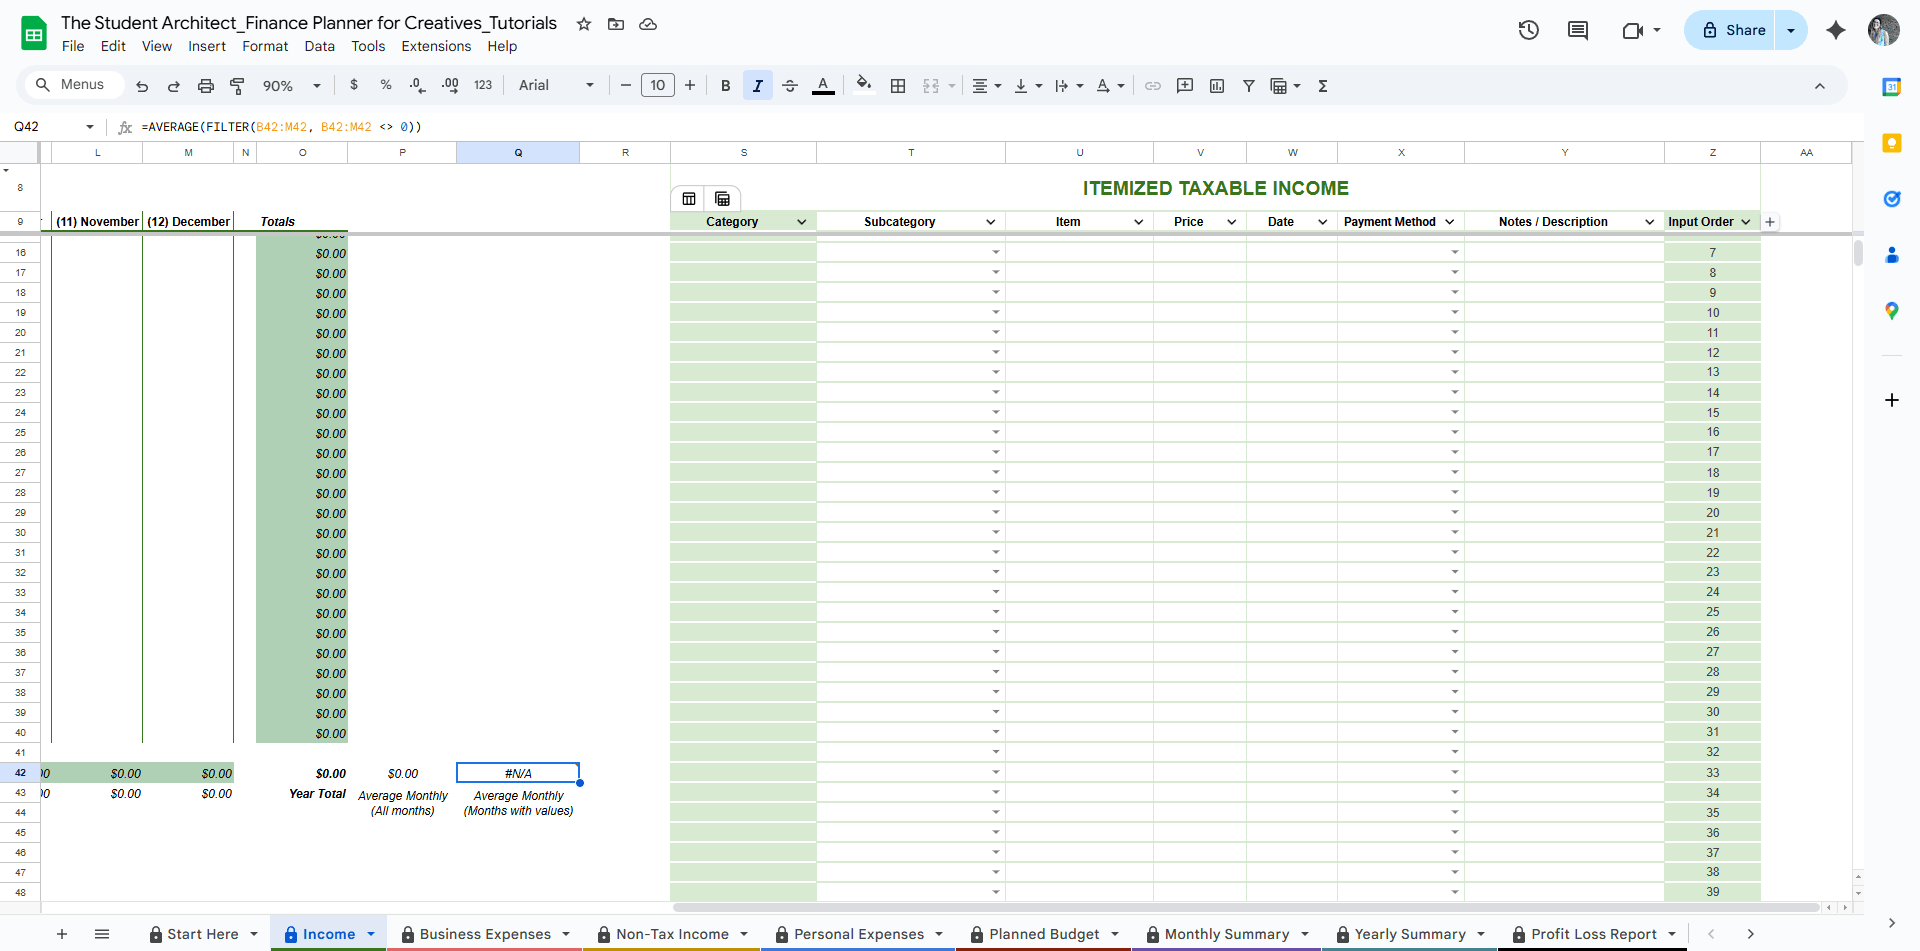
  • You may make copies of the files for your own use (e.g., backups), but sharing, distributing, reselling, or gifting the original Product, modified versions, or any part of it to others is strictly prohibited.

  • This Product is for use by you (and optionally your authorized partner or accountant) only. Unauthorized sharing or distribution is a violation of copyright.

  • Important: To ensure continued access, please save a copy of the Product to your personal Google Drive immediately after purchase. Access to product links or online files is not guaranteed indefinitely.

2. Third-Party Services and Limitations

  • The Finance Planner for Creatives relies on third-party platforms such as Google Sheets for functionality and delivery.

  • I am not responsible or liable for any issues, outages, changes in service, data loss, or access limitations caused by Google or any other third-party services.

  • It is your responsibility to maintain backups of your files and ensure you have continued access by saving copies to your personal device or cloud storage.

3. No Professional Financial or Tax Advice

  • The Product is a tool to help you organize and plan your finances but does not constitute financial, tax, or legal advice.

  • You should consult a qualified professional regarding your specific financial, tax, or legal situation.

  • I am not responsible for any decisions or results you make based on using this Product.

4. Refunds and Cancellations

  • Due to the digital nature of the Product, all sales are final.

  • If you experience any issues accessing the Product, please contact me promptly here, and I’ll help resolve the issue.

5. User Responsibilities

  • You agree to use the Product lawfully and responsibly.

  • You acknowledge that you are responsible for regularly backing up your data.

6. Intellectual Property Rights

  • All rights, title, and interest in the Product (including text, design, formulas, and files) remain with me.

  • Unauthorized use or copying is prohibited and may result in legal action.

7. Disclaimer of Warranties and Limitation of Liability

  • The Product is provided "as is" without warranties of any kind.

  • I disclaim any liability for damages, losses, or issues arising from use or inability to use the Product.

  • You assume all risk associated with using this Product.

8. Changes to These Terms

  • I reserve the right to update or modify these Terms at any time.

  • Continued use of the Product constitutes acceptance of the updated Terms.

  • Any changes will be posted on this page with a revised “Last Updated” date.

9. Contact

If you have any questions about these Terms, you can reach out via email, just click here.

Privacy Policy for the Finance Planner for Creatives

All Categories  >  Terms + Things  >  Privacy Policy for the Finance Planner for Creatives


Privacy Policy for the Finance Planner for Creatives

when you purchase and use the Finance Planner for Creatives you agree to this policy


This Privacy Policy explains how your information is collected, used, and shared when you interact with the Finance Planner for Creatives, including purchases, feedback, and related services. Chelsea Weibust dba The Student Architect (“I,” “me,” or “my”) is committed to protecting your privacy. By purchasing, downloading, or using this Product, you agree to these Terms.

1. Information I Collect

I may collect the following information when you:

  • Purchase or download the planner

  • Fill out a form (e.g. feedback or contact)

  • Subscribe to emails or updates

This includes:

  • Your name

  • Email address

  • Purchase details

  • Feedback responses

  • Any other information you choose to provide

2. How I Use Your Information

Your information is used to:

  • Deliver your product

  • Respond to feedback or support requests

  • Send helpful updates or resources

  • Improve the planner and related services

  • Maintain internal records (such as purchases or feedback)

3. Third-Party Services

This Privacy Policy does not apply to the practices of third parties that I do not own or control, including but not limited to any third-party websites, platforms, tools, or services (“Third Party Services”) that you may access or interact with through the use of the Finance Planner for Creatives or my website.

While I aim to work with trusted tools and services that value your privacy, I cannot take responsibility for the content, security, or privacy practices of any Third Party Services. I encourage you to review the privacy policies of any Third Party Services you choose to use.

These services may collect or process your data in accordance with their own privacy policies. I do not sell or rent your personal data.

4. Cookies & Analytics

My website may use basic cookies or analytics tools to understand how visitors use the site and improve the experience. This data is anonymous and not linked to your identity.

5. Data Storage & Security

Your information is stored securely through trusted third-party platforms. While I take reasonable precautions, I cannot guarantee absolute security of your data transmitted via the internet.

Please save a personal copy of your purchased files immediately, as long-term access via links is not guaranteed.

6. Your Rights

Depending on your location, you may have rights under data protection laws (e.g., GDPR, CCPA) including:

  • Accessing your data

  • Requesting corrections or deletion

  • Withdrawing consent

To exercise any of these rights, you can reach out via email, just click here.

7. Changes to This Policy

I may update this Privacy Policy from time to time. Any changes will be posted on this page with a revised “Last Updated” date.

8. Contact

If you have questions about this Privacy Policy or your data, you can reach out via email, just click here.

How to Hide and Unhide Columns You Don’t Need in the Finance Planner for Creatives

All Categories  >  Customizing  >  How to Hide and Unhide Columns You Don’t Need in the Finance Planner for Creatives


How to Hide and Unhide Columns You Don’t Need in the Finance Planner for Creatives

If certain columns aren’t relevant to how you use the Finance Planner for Creatives—like Billable to Client or Billed on the Business Expenses sheet, or Payment Method on any Income or Expense sheet—you can easily hide them to simplify your view.


✅ To hide a column (or multiple columns):

  1. Right-click on the column letter at the top or click the down arrow to the right of the column letter (e.g., column L)

  2. Select "Hide column."

  3. To hide multiple at once, click and drag across the letters of the columns you want to hide, then right-click and choose "Hide columns X–Y."


🔍 To unhide a column:

  1. Look for the small arrow icon that appears between column letters (e.g., between K and M if L is hidden).

  2. Click the arrow to unhide the column.

💡 Hiding a column doesn't delete its data—it simply removes it from view. This is great for customizing your workflow while keeping everything intact.


⚠️ Important Warning:

If you hide a column that contains formulas—such as the Category column on an Income or Expense sheet—and then drag-select the full table to clear data, any hidden cells will also be cleared, even if you can’t see them.

To avoid this:
Clear the cells in sections around the formula columns or cells, and you can temporarily unhide any formula-based columns first before selecting a large range to clear.

How to Hide or Unhide Instruction Columns or Rows in the Finance Planner for Creatives

All Categories  >  Customizing  >  How to Hide or Unhide Instruction Columns or Rows in the Finance Planner for Creatives


How to Hide or Unhide Instruction Columns or Rows in the Finance Planner for Creatives

Many sheets in the Finance Planner for Creatives include instruction rows or columns to help you understand how to use each section. Once you’re familiar with how things work, you may want to hide these to keep your workspace clean and focused.


✅ How to hide instruction rows:

  1. Click the row number on the far left (e.g., row 1).

  2. Right-click and select "Hide row."


How to Hide Multiple Rows at Once

To hide a group of consecutive rows:

  • Click and drag across the row numbers on the left to select them

  • Then, right-click and choose “Hide rows”

To hide rows that aren’t next to each other:

  • Hold Ctrl (or Cmd on Mac), then click each individual row number you want to hide

  • Right-click one of the selected rows and choose “Hide rows”

To quickly select a range of rows between two points:

  • Click the first row number

  • Hold Shift, then click the last row number in the range

  • Right-click and choose “Hide rows”


✅ How to hide instruction columns:

  1. Click the column letter at the top (e.g., column A).

  2. Right-click and select "Hide column."


How to Hide Multiple Columns at Once

To hide a group of consecutive columns:

  • Click and drag across the column letters on the top to select them

  • Then, right-click and choose “Hide columns”

To hide columns that aren’t next to each other:

  • Hold Ctrl (or Cmd on Mac), then click each individual column letter you want to hide

  • Right-click one of the selected columns and choose “Hide columns”

To quickly select a range of columns between two points:

  • Click the first column letter

  • Hold Shift, then click the last column letter in the range

  • Right-click and choose “Hide columns”


🔍 How to unhide hidden rows or columns:

  • Look for the small arrow icon between rows or columns—click it to reveal hidden content.


💡 Tips:

  • You may see a popup warning when hiding or unhiding rows and columns. This warning can safely be ignored in this case. See more on popup warnings here  →

  • Hiding instruction rows or columns can be helpful, but if you select an entire area (including hidden rows or columns) and try to clear it, you may accidentally delete hidden instructions or formulas.
    Always double-check your selection before clearing data. See more on cells you should edit and how to safely clear data.

How to Change Dropdown Type and Option Colors in the Finance Planner for Creatives

All Categories  >  Customizing  >  How to Change Dropdown Type and Option Colors in the Finance Planner for Creatives


How to Change Dropdown Type and Option Colors in the Finance Planner for Creatives

Many sheets in the Finance Planner for Creatives use dropdowns to make data entry quicker and more consistent. You can customize both the dropdown type and the colors of the dropdown options to better suit your workflow and highlight important info at a glance. Once you know how to adjust these settings, you can make the planner feel more intuitive, organized, and personalized to your needs.


🔽 Dropdown Style Options:

You can change how your dropdowns appear in cells depending on your preferences:

  • Arrow icon: Shows a dropdown arrow in the cell (the most common option)

  • Blank cell: Hides the dropdown arrow but keeps the dropdown active

  • Chip-style: Shows selected options as colored labels (helpful for visibility)

⚙️ To change the dropdown style:

  1. Double click the dropdown cell

  2. Scroll to the bottom of the dropdown list and click the Edit Button at the bottom right.

  3. In the side panel, scroll to down and click Advanced Options

  4. Choose your preference

  5. Click Done


🎨 Color-Coding Dropdown Options:

  • Each option in the dropdown list can be assigned a color using conditional formatting or dropdown chip styling

Follow steps 1 and 2 above or see how here →


✏️ Note on New or Edited Options:

  • When you add or edit options in the dropdown lists, they may appear grey by default

  • You can update their color using the steps above

💡 Tip: Keeping colors consistent (such as by category) helps visually group related items on the income and expense sheets.

How to Show Alternating Colors on Tables in the Finance Planner for Creatives

All Categories  >  Customizing  >  How to Show Alternating Colors on Tables in the Finance Planner for Creatives


How to Show Alternating Colors on Tables in the Finance Planner for Creatives

Want to make your income and expense logs easier to scan in the Finance Planner for Creatives? You can turn on alternating row colors for better readability—especially helpful for longer tables.


✅ To apply alternating colors:

  1. Hover over the top-left corner of the table. You’ll see two icons appear.

  2. Click the left-most icon.

  3. From the dropdown, choose Table FormattingShow Alternating Colors.

  4. For more options, select View Advanced Options to:

    • Customize your color palette

    • Adjust banding style

💡 Tips:

  • Alternating colors are just for looks—they won’t affect formulas, data, or dropdowns.

  • This works great on the Income and Expense Logs, where you’re regularly reviewing and entering data across many rows.


⚠️ Heads up:
A warning might pop up when applying formatting—you can safely ignore it if you're just adjusting colors. Nothing will be overwritten as long as you don’t edit or delete shaded or protected cells. See more on popup warnings here  →

How to Filter Tables in the Finance Planner for Creatives

All Categories  >  Customizing  >  How to Filter Tables in the Finance Planner for Creatives


How to Filter Tables (Like Income + Expense Logs) in the Finance Planner for Creatives

Want to view only certain entries—like a specific category, date range, or payment method in the Finance Planner for Creatives? Filtering helps you focus on the data you need without deleting anything.


✅ How to filter a table:

  1. Find the table you want to filter.

  2. Click on the down arrow (▼) at the header in the column you want to filter by.

  3. Click Filter Column and choose one or more filter option(s):

    • Filter by color

      • Choose a color option

    • Filter by condition

      • Choose condition

    • Filter by values

      • Choose values to display

💡 Use filters to:

  • Review income or expenses for a specific category

  • Check transactions from a certain time period

  • Troubleshoot entries with missing info

  • Isolate duplicate entries

  • Make recurring entries easier - see more on this here  →


⚠️ Warning:
You’ll likely see a warning popup when applying filters—you can safely ignore this as long as you're only filtering. Filtering doesn’t delete or change data, it only hides what doesn’t match the filter. See more on popup warnings here  →


🔄 How to Remove Filters:

  • Go to the Ribbon and click the Filter icon

  • Or go to Data → Remove filter

How to Sort Tables in the Finance Planner for Creatives

All Categories  >  Customizing  >  How to Sort Tables in the Finance Planner for Creatives


How to Sort Tables (Like Income + Expense Logs) in the Finance Planner for Creatives

Need to organize your data by date, amount, category, or any other column in the Finance Planner for Creatives? Sorting helps you quickly make sense of your transactions.


✅ How to sort a table:

  1. Find the table you want to sort.

  2. Click the down arrow (▼) in the column you want to sort.

  3. Go to Sort Column and choose:

    • Sort A → Z for ascending (e.g., oldest to newest, lowest to highest)

    • Sort Z → A for descending (e.g., newest to oldest, highest to lowest)

💡 Common ways to sort:

  • By Date to review your finances chronologically

  • By Price to spot large transactions

  • By Category or Subcategory to group like entries together


⚠️ Warnings:

  1. You may see a popup about editing in a protected range or changing cell content — you can safely ignore this if you're only sorting a table. See more on popup warnings here  →

  2. Sorting is not permanent, but there’s no “remove sort” button. To establish your original order before sorting, you can:

    • Create a manual sorting system by adding a column with numbered rows (like 1 to 1000). This way, you can always sort by that column to return to your original input order.


🔁 How to Undo Sorting:

  • You can remove the sort using the undo button (Ctrl+Z)

  • Sort by a manual sorting system you can create before sorting using the steps described above

Fixing Errors in the Finance Planner for Creatives

All Categories  >  Troubleshooting  >  Fixing Errors in the Finance Planner for Creatives


Fixing Errors in the Finance Planner for Creatives

Most errors in the Finance Planner for Creatives are simple to fix and happen when dropdowns are changed, or cells are cleared or edited outside the editable areas. Here are a few common issues and how to fix them:


🚩 Flagged Dropdown Selections

If you see a red triangle or an error warning on a dropdown cell, it usually means that the selected option no longer exists in the dropdown list. This can happen if you:

  • Renamed or deleted a category, subcategory, retailer, or payment method from the editable dropdown list

  • Overwrote a cell that had a valid option with a value not included in the list

How to fix it:

  1. Click on the cell with the flagged error

  2. Choose a valid option from the dropdown list

  3. OR, if the option is still needed, simply add the desired option back to the dropdown list section on the Income or Expense sheet, and the flag will disappear

More on customizing dropdowns here  →

More on formatting dropdowns here  →


⚠️ Protected Cell Editing Warnings

If you see a popup saying you're trying to edit a protected range, this means you're clicking a cell with formulas or locked formatting.

What to do:

  • Click Cancel when prompted

  • Double-check that you're only editing bordered, unshaded cells or the clearly labeled dropdowns sections

More on popup warnings here   →

See more on which cells you should and shouldn’t edit here  →


🧮 Calculation Errors

If a chart or total isn’t updating correctly, check for:

  • Missing required fields (e.g., price, date, or category - see more on required fields for income and expense logs)

  • Invalid dropdown entries (see above)

  • Incorrect formatting (e.g., entering text in a number field)


❗ Spreadsheet Errors (e.g., #N/A, #REF!, #VALUE!, etc.)

Here’s what these mean and how to fix them:

  • #N/A — Usually means a formula is looking for a value that doesn't exist (e.g., trying to match a category that was deleted).
    🔧 Fix: Check for missing or mismatched dropdown options.

  • #REF! — Means a formula is referencing a cell or cell range that was deleted.
    🔧 Fix: Try undoing your last change (Cmd+Z / Ctrl+Z), or re-copy the correct formulas from a clean copy.

  • #VALUE! — Happens when a formula is using the wrong type of input (e.g., text instead of a number).
    🔧 Fix: Make sure you're only entering numbers where numbers are expected.

  • #DIV/0! — Appears when a formula is trying to divide by zero or a blank cell.
    🔧 Fix: Make sure all relevant fields (like price) are filled out.

  • Blank Charts or Broken Visuals — Often caused by missing required data (price, date, or dropdown selection). See more on required fields for income and expense logs)
    🔧 Fix: Check the itemized logs for missing or invalid entries.

Understanding the Warning Popups in the Finance Planner for Creatives

All Categories  >  Troubleshooting  >  Understanding the Warning Popups in the Finance Planner for Creatives


Understanding the Warning Popups in the Finance Planner for Creatives

You may see a warning popup when you try to make certain changes in the Finance Planner for Creatives. These warnings are designed to protect formulas or formatting in important areas of the planner—but not all warnings require action.

Here’s how to know when to pay attention… and when it’s safe to ignore the message.


✅ When It’s Safe to Disregard the Warning:

You can safely ignore the popup if you’re doing any of the following:

  • Hiding or expanding rows/columns

  • Resizing rows/columns

  • Sorting or filtering the itemized tables

  • Changing cell colors or formatting

In these cases, just click “OK” or “Continue” to proceed.


⚠️ When to Pay Attention:

Always pause and double-check your selection if you see a warning while:

  • Editing a shaded or non-bordered cell (which is locked for a reason)

  • Deleting cells or dragging over areas that may contain formulas

  • Modifying header rows or labels

  • Overwriting any cell that doesn’t have a visible border

If you're unsure, it's best to cancel, review the instructions on the sheet, and make sure you're only editing cells that are clearly marked as editable.


💡Tip: If you're trying to clear or update data and get a warning, make sure your selection includes only bordered cells, or refer to the “Clearing Data Safely” guide for step-by-step help.

See more on which cells you should and shouldn’t edit here  →

See more on how to clear data safely →

Troubleshooting Chart Issues in the Finance Planner for Creatives

All Categories  >  Troubleshooting  >  Troubleshooting Chart Issues in the Finance Planner for Creatives


Troubleshooting Chart Issues in the Finance Planner for Creatives

The Finance Planner for Creatives uses dynamic charts to help you visualize your income, expenses, goals, and more. If something looks off, don’t worry—here’s how to troubleshoot common chart issues:


🟦 Blank Charts

If a chart is showing up empty, it usually means it’s missing the data it needs to display.

Try the following:

  • Check your data: Make sure you've entered enough information in the appropriate income/expense/planned budget sheet.

  • 📆 Adjust the date or range: Some charts depend on selecting a specific month. Double-check any dropdowns that might be affecting what’s shown and ensure there is data logged on the income/expense/planned budget sheets during that time.

  • 🗂️ Ensure required categories are used: If a chart pulls data by category or subcategory, those fields need to be filled out. (See more on required fields for income and expense logs)


🔍 Blurry or Pixelated Charts

If a chart looks blurry:

  • 🔄 Refresh your browser: Blurriness often happens after zooming in/out or switching tabs.

  • 🔎 Reset your zoom: Try setting your browser zoom to 100%.

  • 🖥️ Switch devices: Sometimes switching from mobile to desktop (or vice versa) can help if display issues persist.


📈 Viewing Exact Values

To see specific numbers on a chart:

  • 🖱️ Click once on the chart to activate it

  • Hover your cursor over a section (bar, slice, etc.)

  • 📊 You’ll see the exact value and, when applicable, the percentage

This is a great way to get more insights without changing anything in the sheet.


Still Stuck?

If the chart still isn't displaying correctly, review the related guide for that sheet (e.g., Goals, Income Tracking, Summaries) to confirm which inputs are needed. See all guide sections here  →

Fixing Deleted or Overwritten Formulas in the Finance Planner for Creatives

All Categories  >  Troubleshooting  >  Fixing Deleted or Overwritten Formulas in the Finance Planner for Creatives


Fixing Deleted or Overwritten Formulas in the Finance Planner for Creatives

Accidentally deleted or changed a formula in the Finance Planner for Creatives? No worries—here are a few easy ways to recover it:


⏪ 1. Undo Right Away

  • Press CTRL + Z (or CMD + Z on Mac)

  • Or click the Undo button in the top-left toolbar
    This is the fastest fix if you catch the error right away!


🧲 2. Copy from a Nearby Cell

If a single formula cell is missing or overwritten:

  • Click the cell directly above or below the one with the missing formula

  • Hover over the small blue dot in the bottom-right corner of the selected cell

  • Click and drag down (or up) to fill the formula into the empty cell(s)

💡 This works best in tables where formulas are consistent down the column.


🗂️ 3. Restore from the Original Copy

If a lone cell, entire row, column, or larger section was deleted:

  • Open your original untouched copy of the planner

  • Navigate to the same sheet and cell(s)

  • Copy the formula from the original

  • Paste it into your working file

🔒 TIP: It’s a good idea to always keep an original backup copy stored safely in your Drive just in case!

Using the Finance Planner for Creatives Outside of Google Sheets

All Categories  >  Troubleshooting  >  Using the Finance Planner for Creatives Outside of Google Sheets


Using the Finance Planner for Creatives Outside of Google Sheets

This Finance Planner for Creatives was built exclusively for use with Google Sheets and is not compatible with Microsoft Excel, Numbers, or other spreadsheet software.


⚠️ Why It Doesn’t Work in Other Programs

Many of the planner’s features rely on:

  • Google Sheets–specific functions and formulas

  • Interactive elements like dropdowns, charts, and protected cell behavior

  • Real-time syncing across sheets for summaries, goals, and insights

These features often break or disappear when the file is opened in:

  • Microsoft Excel

  • Apple Numbers

  • OpenOffice

  • Other non-Google spreadsheet tools


✅ How to Use the Planner Correctly:

📝 TIP: You can still export or print sheets as PDFs if someone (like an accountant) needs a copy but doesn’t use Google Sheets. See how  →


👀If your collaborator doesn’t use Google Sheets and only needs to view (not edit), you can:

Click Share (top-right corner)

  1. At the bottom, click "Anyone with the link"

  2. Set the access to Viewer (or Commenter if desired)

  3. Copy the link and share

➡️ This is great for sharing a read-only version with clients, accountants, or collaborators who don’t use Google and don’t need editing permissions.

How to Copy and Paste Info into a New Version of the Finance Planner for Creatives

All Categories  >  Troubleshooting  >  How to Copy and Paste Info into a New Version of the Finance Planner for Creatives


How to Copy and Paste Info into a New Version of the Finance Planner for Creatives

If you've already started using your Finance Planner for Creatives and a new version becomes available, you don’t have to start from scratch! You can easily transfer your existing data—like income and expense logs—into the updated file. It’s best to do this on a laptop or computer. Here’s how to do it smoothly:


📋 Step-by-Step Instructions:

  1. Open Both Workbooks Side by Side

    • Open your current/older planner (with your data already entered).

    • Open the new version of the planner in a separate tab or window.

  2. Navigate to the Log Sheet (e.g., Income + Expenses)

    • In your old file, go to the sheet that contains the info you want to copy.

  3. Select the Data You Want to Transfer in Batches

    • Drag-select only the cells within the bordered area (the main logging section).

    • Avoid shaded cells—these are often formulas or instructions and may differ between versions.

    • Select groups of rows and columns in batches to keep things manageable.

  4. Copy the Selection

    • Use Ctrl + C (Windows) or Cmd + C (Mac), or right-click and select Copy.

  5. Paste into the New Planner

    • Go to the same sheet and find the same area in the new file.

    • Find the first empty row.

    • Click the first cell in the row and use Ctrl + V (Windows) or Cmd + V (Mac) to paste.

  6. Double-Check Dropdowns + Formatting

    • Make sure your pasted data still aligns with dropdowns and formatting.

    • If something looks off, try Paste values only to avoid bringing over outdated formatting:

      • Right-click > Paste special > Paste values only

  7. Repeat as Needed for Other Areas and Sheets

    • If you’ve been using other sections (like dropdown options, planned budget, goals, etc.), repeat the same process for those.


✅ Tips for a Smooth Transfer:

  • Work in small batches if you have a large amount of data—this reduces the chance of formatting issues.

  • Always back up your original file before making any changes, just in case!

  • Be sure to skip shaded and formula cells—the new version may have updated logic you don’t want to overwrite.

How to Share the Financial Planner for Creatives (for Collaboration Only)

All Categories  >  Sharing + Printing  >  How to Share the Financial Planner for Creatives (for Collaboration Only)


How to Share the Financial Planner for Creatives (for Collaboration Only)

The Finance Planner for Creatives was designed to support your financial clarity—but that doesn't mean it should be shared freely.

🔒 Please note: This planner is for personal use only. Sharing, copying, or distributing it outside of your own use (including sharing with friends, posting it publicly, or reselling it) is not permitted under the Terms of Use and Copyright Policy.
Thank you for respecting the time, work, and care that went into building this tool!


💼 Sharing with a Partner or Accountant

Need to share your planner with a collaborator—like a partner, accountant, or bookkeeper? Here's how to do it securely within Google Sheets:

  1. Click FileShareShare with others

  2. Enter the email address of the person you’d like to invite

  3. Choose their access level:

    • Viewer (can only view)

    • Commenter (can leave comments)

    • Editor (can make changes—use with caution!)

  4. Click Send or copy the Share link if needed

Tip: To avoid accidental edits, consider sharing a view-only version or making a duplicate with limited information before sharing.


Want to print instead? See how here  →

How to Print from the Finance Planner for Creatives

All Categories  >  Sharing + Printing  >  How to Print from the Finance Planner for Creatives


How to Print from the Finance Planner for Creatives

Need a hard copy of information from your Finance Planner for Creatives for a meeting, your accountant, or just for your own records? Google Sheets gives you plenty of control over what and how you print. Here’s how to get the results you want:


1. Open the Print Settings

Click File → Print or use the shortcut CTRL + P (Windows) or CMD + P (Mac). This will open a Print preview window where you can customize your printout.


2. Choose What to Print

In the top right dropdown, choose one of the following:

  • Current sheet – prints the full sheet you're viewing

  • Selected cells – great for printing just a section of the sheet (select the cells before opening the print window)

  • Entire workbook – prints all sheets at once (this isn’t recommended as different sheets may need different print settings)


3. Adjust the Layout

Under Layout, you can fine-tune how your sheet prints:

  • Paper size – Use Letter (8.5x11") or A4 for standard printers

  • Orientation – Choose between Portrait (vertical) or Landscape (horizontal)

  • Margins – Choose from Normal, Narrow, or Wide margins to control how much white space surrounds your content

  • Scaling – Use options like Fit to width, Fit to height, or Fit to page to avoid cutoff columns or reduce excess pages


4. Set Page Breaks (Optional)

Need more control over where your page splits?
In the Print window, click SET CUSTOM PAGE BREAKS. Drag the blue lines to adjust.


5. Formatting Options

Fine-tune how your spreadsheet looks on the page:

  • Show or hide gridlines and notes

  • Page order – Choose whether pages print over, then down (rows first) or down, then over (columns first)

  • Alignment – Set horizontal and vertical alignment to control how content is positioned within each printed cell (e.g. center-align your data for cleaner printouts)


6. Headers, Footers + More Options

Expand the Headers & Footers sections to:

  • Add a title, date, page numbers, or sheet name

  • Choose whether to repeat frozen row or column headers on each page


7. Preview + Print

Double-check your preview on the right. When it looks right:

  • Click Next

  • Choose your printer or Save as PDF

  • Click Print


📝 Tips:

  • Use Selected cells if you only want to print a portion of a sheet.

  • Try Landscape orientation if your data has lots of columns.

  • It is recommended that you save a PDF copy before printing, so you have a record.

  • Hide any instructional rows or columns that you don’t want to appear in your final printout. See how →

How to Use the Profit & Loss Report in the Finance Planner for Creatives

All Categories  >  Tax Sheets  >  How to Use the Profit & Loss Report in the Finance Planner for Creatives


How to Use the Profit & Loss Report in the Finance Planner for Creatives

Your Profit & Loss Report (P&L) in the Finance Planner for Creatives is a ready-to-print, auto-generated snapshot of your business finances—perfect for tax time, quarterly reviews, or client records.


🧾 What It Does

This report automatically pulls in all taxable income and business expenses you’ve entered throughout the year—no manual input needed.


🗓️ Date Range

The report is set to span January 1 to December 31, or adjusts based on your earliest taxable income entry. This ensures your totals reflect only the relevant tax year.

Note: The year shown on the sheet is autopopulated based on your income entries.


🧍 Add Your Info

Simply add your name or business name at the top of the sheet before printing or saving it as a PDF.


📊 Two Report Formats

The sheet provides two easy-to-read summaries:

1. Annual Totals

  • Condensed year-end summary of taxable income and business expenses

  • Organized by subcategory, with clear category breaks for easy scanning

2. Monthly Breakdown

  • A more detailed view showing totals per subcategory by month

  • Helps you track trends, identify high-cost periods, and compare monthly patterns

⚠️ Note: If you add or remove subcategories in your dropdowns, the category dividers may not align perfectly. The report will still function, but the visual grouping might need minor adjustments.


🖨️ Ready to Print

Whether you're prepping for taxes or sending records to an accountant, just review and print—no extra formatting needed. See here for more printing tips  →

How to Use the Taxes Sheet in the Finance Planner for Creatives

All Categories  >  Tax Sheets  >  How to Use the Taxes Sheet in the Finance Planner for Creatives


How to Use the Taxes Sheet in the Finance Planner for Creatives

The Taxes sheet in the Finance Planner for Creatives is your central hub for planning, saving, and tracking your estimated quarterly taxes—so you're never caught off guard come tax time.


🎯 What It Helps You Do

  • Estimate how much to save each month and quarter

  • Track how much you've actually set aside

  • Stay on target with your tax savings goals

  • Keep a clear record of what you owe, what you’ve saved, and what you’ve already paid


✏️ What to Edit

Only modify the bordered cells—these are specifically designed for user input to ensure the rest of the sheet calculates and functions correctly.

See more on editing cells here  →


🧮 Set Your Estimated Tax Rates

  • Enter your estimated federal and state tax rates at the top of the sheet.

  • These rates determine how much of your taxable income you’ll need to set aside for estimated quarterly taxes.

  • Tip: It’s best to consult with a tax professional to determine the most accurate rates for your situation.


💰 Plan + Save Each Month

  • As you log taxable income and business expenses, the sheet will estimate how much you should save each month and quarter.

  • You can also input how much you’ve actually saved to stay on track throughout the year.


🧾 Document Your Tax Payments

  • Use the section at the bottom to record your actual federal and state tax dues and payments.

  • Keep a clean record of when and how much you’ve paid toward your quarterly or annual taxes and easily share it with your accountant.

✅ Staying proactive with this sheet helps reduce tax-time stress and gives you a real-time picture of where you stand—no surprises.

See here for sharing + printing tips  →

How to Use the Monthly Summary in the Finance Planner for Creatives

All Categories  >  Summaries  >  How to Use the Monthly Summary in the Finance Planner for Creatives


How to Use the Monthly Summary in the Finance Planner for Creatives

The Monthly Summary in the Finance Planner for Creatives gives you a bird’s-eye view of your financial activity for any given month—making it easy to assess, adjust, and move forward with clarity.

Here’s how to use it:

🔄 Select Your Month

Use the dropdown menu at the top of the sheet to choose the month you want to review. All charts and totals will update automatically to reflect the data for that month.


📊 Section Breakdown & Insights

See how your actual income and expenses stack up against what you planned for that month.

  • Check out the Planned Budget sheet if you haven’t already entered your monthly targets.

  • Logged transactions from the Income + Expense sheets will feed into these actual totals.


💼 Planned vs Actual — Income, Expenses & More

Each comparison includes:

  • A category breakdown chart showing how income or expenses were distributed

  • % increase or decrease from your plan

  • $ difference between actual and planned, with a written explanation of what it means

  • A bar chart comparing actual vs planned

  • A table breakdown by category

These insights are available for:

  • Taxable Income

  • Business Expenses

  • Non-Taxable Income

  • Personal Expenses

Want to see values on charts? Have other chart questions? See more here  →


🧾 Business Health

See how your taxable income compares with your business expenses to better understand your monthly business performance.

This section includes:

  • A donut chart comparing taxable income to business expenses

  • % increase or decrease in business funds for the month

  • $ net business income for the month

  • A bar chart comparing taxable income to business expenses

  • A table breakdown with totals


🧘‍♀️ Total Financial Health

Review your total income vs total expenses (across business and personal).

This section shows:

  • A donut chart comparing total income to total expenses

  • % increase or decrease in total funds for the month

  • $ net total income for the month

  • A bar chart comparing total income to total expenses

  • A table breakdown with totals

Tip: Don’t worry if your month doesn’t go as planned. Use the data to learn from the past and adjust for the future—this planner is here to help, not judge!

How to Use the Yearly Summary in the Finance Planner for Creatives

All Categories  >  Summaries  >  How to Use the Yearly Summary in the Finance Planner for Creatives


How to Use the Yearly Summary in the Finance Planner for Creatives

The Yearly Summary in the Finance Planner for Creatives offers a high-level view of your financial performance across the entire year. It’s perfect for spotting trends, measuring progress, and reflecting on both your business and personal finances—all in one place.


✅ No Setup Needed

Unlike the Monthly Summary, there's no need to select a specific month. This sheet automatically pulls data from your itemized income and expense logs and planned budget to summarize your entire year.


📊 Section Breakdown & Insights

See how your actual income and expenses stack up against what you planned over the year.

  • Check out the Planned Budget section if you haven’t already entered your monthly targets.

  • Logged transactions from the Income + Expense sheets will feed into these actual totals.


💼 Planned vs Actual — Income, Expenses & More

Each section includes:

  • A category breakdown chart showing how income or expenses were distributed

  • % increase or decrease from your plan

  • $ difference between actual and planned

  • A bar chart comparing actual vs planned

  • A table breakdown by category

These insights are available for:

  • Taxable Income

  • Business Expenses

  • Non-Taxable Income

  • Personal Expenses

Want to see values on charts? Have other chart questions? See more here  →


🧾 Business Health

See how your taxable income compares with your business expenses to better understand your business performance over the year.

This section includes:

  • A donut chart comparing taxable income to business expenses

  • % increase or decrease in business funds for the year

  • $ net business income for the year

  • A bar chart comparing taxable income to business expenses

  • A table breakdown with totals


🧘‍♀️ Total Financial Health

Review your total income vs total expenses (across business and personal).

This section shows:

  • A donut chart comparing total income to total expenses

  • % increase or decrease in total funds for the year

  • $ net total income for the year

  • A bar chart comparing total income to total expenses

  • A table breakdown with totals


📆 Bonus Yearly Charts

The Yearly Summary includes additional visuals to help you reflect on:

  • Trends over time (month-to-month comparisons)

  • Monthly income and expenses across the year

  • Business profit trends across the year

  • Total profit trends across the year

Tip: Use this sheet at the end of each quarter and especially at year-end to reflect, celebrate wins, and plan for the year ahead.