Troubleshooting

Fixing Errors in the Finance Planner for Creatives

All Categories  >  Troubleshooting  >  Fixing Errors in the Finance Planner for Creatives


Fixing Errors in the Finance Planner for Creatives

Most errors in the Finance Planner for Creatives are simple to fix and happen when dropdowns are changed, or cells are cleared or edited outside the editable areas. Here are a few common issues and how to fix them:


🚩 Flagged Dropdown Selections

If you see a red triangle or an error warning on a dropdown cell, it usually means that the selected option no longer exists in the dropdown list. This can happen if you:

  • Renamed or deleted a category, subcategory, retailer, or payment method from the editable dropdown list

  • Overwrote a cell that had a valid option with a value not included in the list

How to fix it:

  1. Click on the cell with the flagged error

  2. Choose a valid option from the dropdown list

  3. OR, if the option is still needed, simply add the desired option back to the dropdown list section on the Income or Expense sheet, and the flag will disappear

More on customizing dropdowns here  →

More on formatting dropdowns here  →


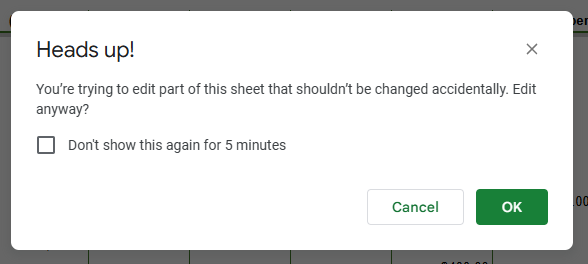
⚠️ Protected Cell Editing Warnings

If you see a popup saying you're trying to edit a protected range, this means you're clicking a cell with formulas or locked formatting.

What to do:

  • Click Cancel when prompted

  • Double-check that you're only editing bordered, unshaded cells or the clearly labeled dropdowns sections

More on popup warnings here   →

See more on which cells you should and shouldn’t edit here  →


🧮 Calculation Errors

If a chart or total isn’t updating correctly, check for:

  • Missing required fields (e.g., price, date, or category - see more on required fields for income and expense logs)

  • Invalid dropdown entries (see above)

  • Incorrect formatting (e.g., entering text in a number field)


❗ Spreadsheet Errors (e.g., #N/A, #REF!, #VALUE!, etc.)

Here’s what these mean and how to fix them:

  • #N/A — Usually means a formula is looking for a value that doesn't exist (e.g., trying to match a category that was deleted).
    🔧 Fix: Check for missing or mismatched dropdown options.

  • #REF! — Means a formula is referencing a cell or cell range that was deleted.
    🔧 Fix: Try undoing your last change (Cmd+Z / Ctrl+Z), or re-copy the correct formulas from a clean copy.

  • #VALUE! — Happens when a formula is using the wrong type of input (e.g., text instead of a number).
    🔧 Fix: Make sure you're only entering numbers where numbers are expected.

  • #DIV/0! — Appears when a formula is trying to divide by zero or a blank cell.
    🔧 Fix: Make sure all relevant fields (like price) are filled out.

  • Blank Charts or Broken Visuals — Often caused by missing required data (price, date, or dropdown selection). See more on required fields for income and expense logs)
    🔧 Fix: Check the itemized logs for missing or invalid entries.

Understanding the Warning Popups in the Finance Planner for Creatives

All Categories  >  Troubleshooting  >  Understanding the Warning Popups in the Finance Planner for Creatives


Understanding the Warning Popups in the Finance Planner for Creatives

You may see a warning popup when you try to make certain changes in the Finance Planner for Creatives. These warnings are designed to protect formulas or formatting in important areas of the planner—but not all warnings require action.

Here’s how to know when to pay attention… and when it’s safe to ignore the message.


✅ When It’s Safe to Disregard the Warning:

You can safely ignore the popup if you’re doing any of the following:

  • Hiding or expanding rows/columns

  • Resizing rows/columns

  • Sorting or filtering the itemized tables

  • Changing cell colors or formatting

In these cases, just click “OK” or “Continue” to proceed.


⚠️ When to Pay Attention:

Always pause and double-check your selection if you see a warning while:

  • Editing a shaded or non-bordered cell (which is locked for a reason)

  • Deleting cells or dragging over areas that may contain formulas

  • Modifying header rows or labels

  • Overwriting any cell that doesn’t have a visible border

If you're unsure, it's best to cancel, review the instructions on the sheet, and make sure you're only editing cells that are clearly marked as editable.


💡Tip: If you're trying to clear or update data and get a warning, make sure your selection includes only bordered cells, or refer to the “Clearing Data Safely” guide for step-by-step help.

See more on which cells you should and shouldn’t edit here  →

See more on how to clear data safely →

Troubleshooting Chart Issues in the Finance Planner for Creatives

All Categories  >  Troubleshooting  >  Troubleshooting Chart Issues in the Finance Planner for Creatives


Troubleshooting Chart Issues in the Finance Planner for Creatives

The Finance Planner for Creatives uses dynamic charts to help you visualize your income, expenses, goals, and more. If something looks off, don’t worry—here’s how to troubleshoot common chart issues:


🟦 Blank Charts

If a chart is showing up empty, it usually means it’s missing the data it needs to display.

Try the following:

  • Check your data: Make sure you've entered enough information in the appropriate income/expense/planned budget sheet.

  • 📆 Adjust the date or range: Some charts depend on selecting a specific month. Double-check any dropdowns that might be affecting what’s shown and ensure there is data logged on the income/expense/planned budget sheets during that time.

  • 🗂️ Ensure required categories are used: If a chart pulls data by category or subcategory, those fields need to be filled out. (See more on required fields for income and expense logs)


🔍 Blurry or Pixelated Charts

If a chart looks blurry:

  • 🔄 Refresh your browser: Blurriness often happens after zooming in/out or switching tabs.

  • 🔎 Reset your zoom: Try setting your browser zoom to 100%.

  • 🖥️ Switch devices: Sometimes switching from mobile to desktop (or vice versa) can help if display issues persist.


📈 Viewing Exact Values

To see specific numbers on a chart:

  • 🖱️ Click once on the chart to activate it

  • Hover your cursor over a section (bar, slice, etc.)

  • 📊 You’ll see the exact value and, when applicable, the percentage

This is a great way to get more insights without changing anything in the sheet.


Still Stuck?

If the chart still isn't displaying correctly, review the related guide for that sheet (e.g., Goals, Income Tracking, Summaries) to confirm which inputs are needed. See all guide sections here  →

Fixing Deleted or Overwritten Formulas in the Finance Planner for Creatives

All Categories  >  Troubleshooting  >  Fixing Deleted or Overwritten Formulas in the Finance Planner for Creatives


Fixing Deleted or Overwritten Formulas in the Finance Planner for Creatives

Accidentally deleted or changed a formula in the Finance Planner for Creatives? No worries—here are a few easy ways to recover it:


⏪ 1. Undo Right Away

  • Press CTRL + Z (or CMD + Z on Mac)

  • Or click the Undo button in the top-left toolbar
    This is the fastest fix if you catch the error right away!


🧲 2. Copy from a Nearby Cell

If a single formula cell is missing or overwritten:

  • Click the cell directly above or below the one with the missing formula

  • Hover over the small blue dot in the bottom-right corner of the selected cell

  • Click and drag down (or up) to fill the formula into the empty cell(s)

💡 This works best in tables where formulas are consistent down the column.


🗂️ 3. Restore from the Original Copy

If a lone cell, entire row, column, or larger section was deleted:

  • Open your original untouched copy of the planner

  • Navigate to the same sheet and cell(s)

  • Copy the formula from the original

  • Paste it into your working file

🔒 TIP: It’s a good idea to always keep an original backup copy stored safely in your Drive just in case!

Using the Finance Planner for Creatives Outside of Google Sheets

All Categories  >  Troubleshooting  >  Using the Finance Planner for Creatives Outside of Google Sheets


Using the Finance Planner for Creatives Outside of Google Sheets

This Finance Planner for Creatives was built exclusively for use with Google Sheets and is not compatible with Microsoft Excel, Numbers, or other spreadsheet software.


⚠️ Why It Doesn’t Work in Other Programs

Many of the planner’s features rely on:

  • Google Sheets–specific functions and formulas

  • Interactive elements like dropdowns, charts, and protected cell behavior

  • Real-time syncing across sheets for summaries, goals, and insights

These features often break or disappear when the file is opened in:

  • Microsoft Excel

  • Apple Numbers

  • OpenOffice

  • Other non-Google spreadsheet tools


✅ How to Use the Planner Correctly:

📝 TIP: You can still export or print sheets as PDFs if someone (like an accountant) needs a copy but doesn’t use Google Sheets. See how  →


👀If your collaborator doesn’t use Google Sheets and only needs to view (not edit), you can:

Click Share (top-right corner)

  1. At the bottom, click "Anyone with the link"

  2. Set the access to Viewer (or Commenter if desired)

  3. Copy the link and share

➡️ This is great for sharing a read-only version with clients, accountants, or collaborators who don’t use Google and don’t need editing permissions.

How to Copy and Paste Info into a New Version of the Finance Planner for Creatives

All Categories  >  Troubleshooting  >  How to Copy and Paste Info into a New Version of the Finance Planner for Creatives


How to Copy and Paste Info into a New Version of the Finance Planner for Creatives

If you've already started using your Finance Planner for Creatives and a new version becomes available, you don’t have to start from scratch! You can easily transfer your existing data—like income and expense logs—into the updated file. It’s best to do this on a laptop or computer. Here’s how to do it smoothly:


📋 Step-by-Step Instructions:

  1. Open Both Workbooks Side by Side

    • Open your current/older planner (with your data already entered).

    • Open the new version of the planner in a separate tab or window.

  2. Navigate to the Log Sheet (e.g., Income + Expenses)

    • In your old file, go to the sheet that contains the info you want to copy.

  3. Select the Data You Want to Transfer in Batches

    • Drag-select only the cells within the bordered area (the main logging section).

    • Avoid shaded cells—these are often formulas or instructions and may differ between versions.

    • Select groups of rows and columns in batches to keep things manageable.

  4. Copy the Selection

    • Use Ctrl + C (Windows) or Cmd + C (Mac), or right-click and select Copy.

  5. Paste into the New Planner

    • Go to the same sheet and find the same area in the new file.

    • Find the first empty row.

    • Click the first cell in the row and use Ctrl + V (Windows) or Cmd + V (Mac) to paste.

  6. Double-Check Dropdowns + Formatting

    • Make sure your pasted data still aligns with dropdowns and formatting.

    • If something looks off, try Paste values only to avoid bringing over outdated formatting:

      • Right-click > Paste special > Paste values only

  7. Repeat as Needed for Other Areas and Sheets

    • If you’ve been using other sections (like dropdown options, planned budget, goals, etc.), repeat the same process for those.


✅ Tips for a Smooth Transfer:

  • Work in small batches if you have a large amount of data—this reduces the chance of formatting issues.

  • Always back up your original file before making any changes, just in case!

  • Be sure to skip shaded and formula cells—the new version may have updated logic you don’t want to overwrite.