All Categories > Sharing + Printing > How to Print from the Finance Planner for Creatives
How to Print from the Finance Planner for Creatives
Need a hard copy of information from your Finance Planner for Creatives for a meeting, your accountant, or just for your own records? Google Sheets gives you plenty of control over what and how you print. Here’s how to get the results you want:
1. Open the Print Settings
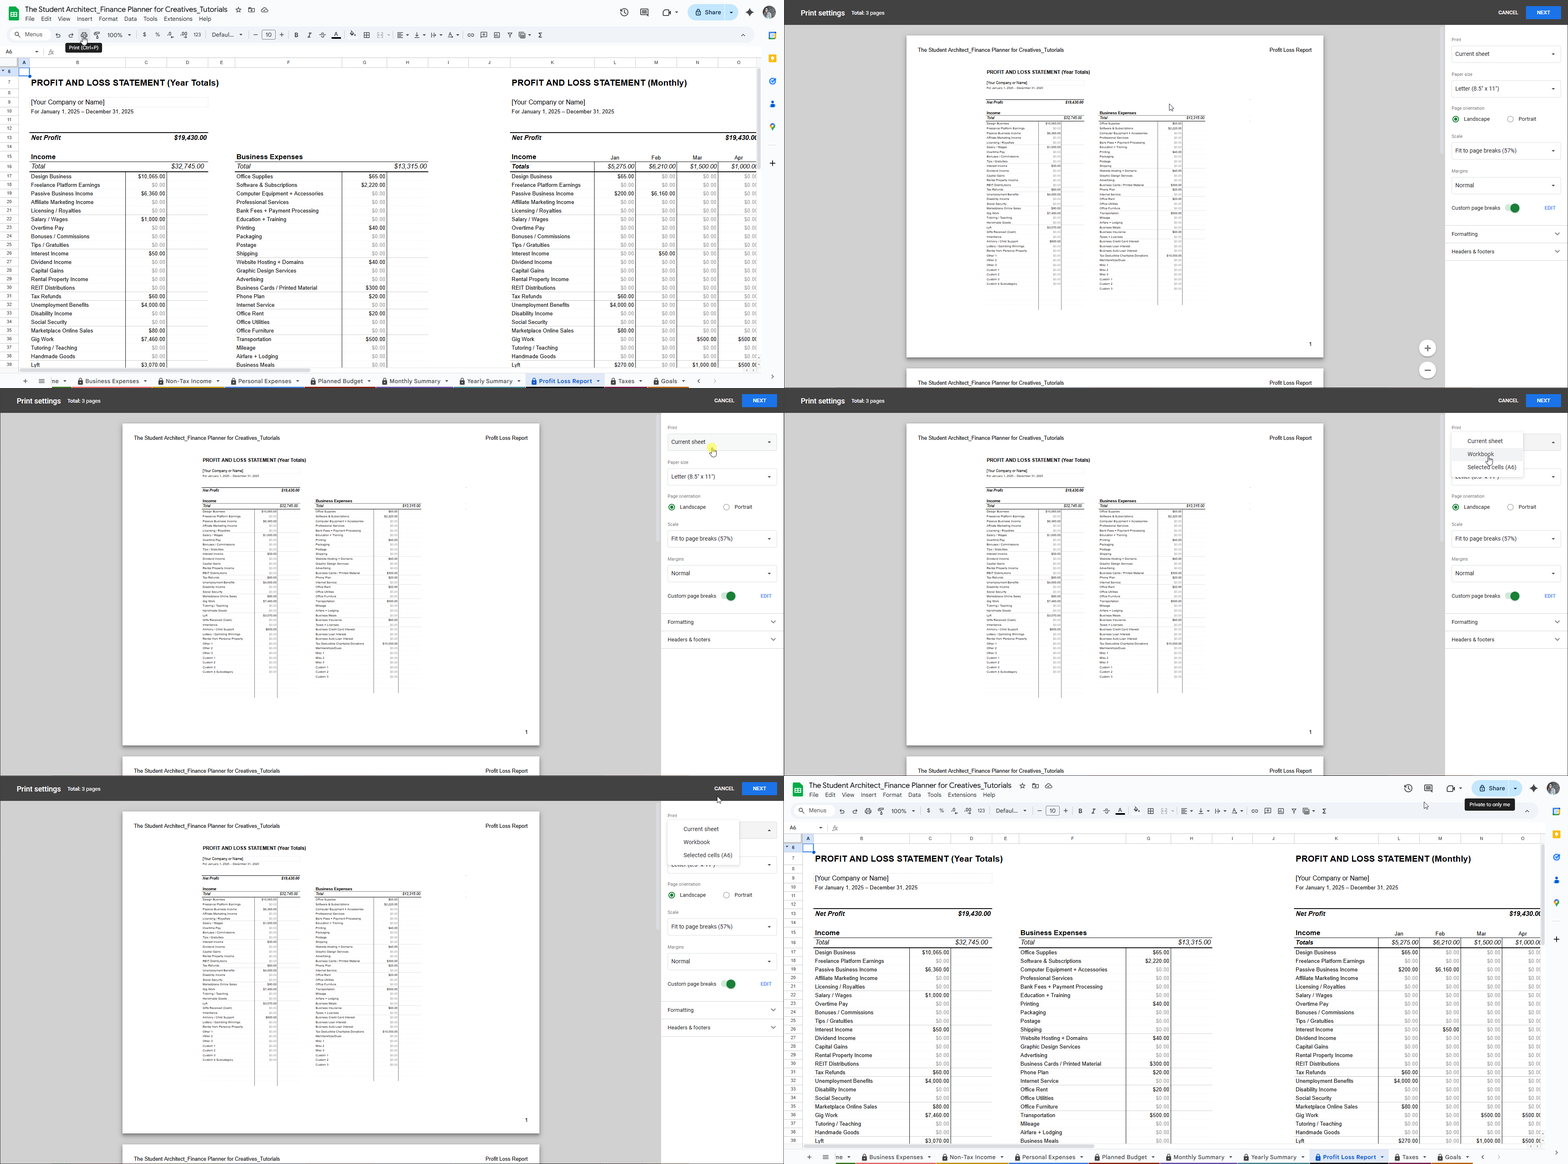
Click File → Print or use the shortcut CTRL + P (Windows) or CMD + P (Mac). This will open a Print preview window where you can customize your printout.
How to open print settings
2. Choose What to Print
In the top right dropdown, choose one of the following:
Current sheet – prints the full sheet you're viewing
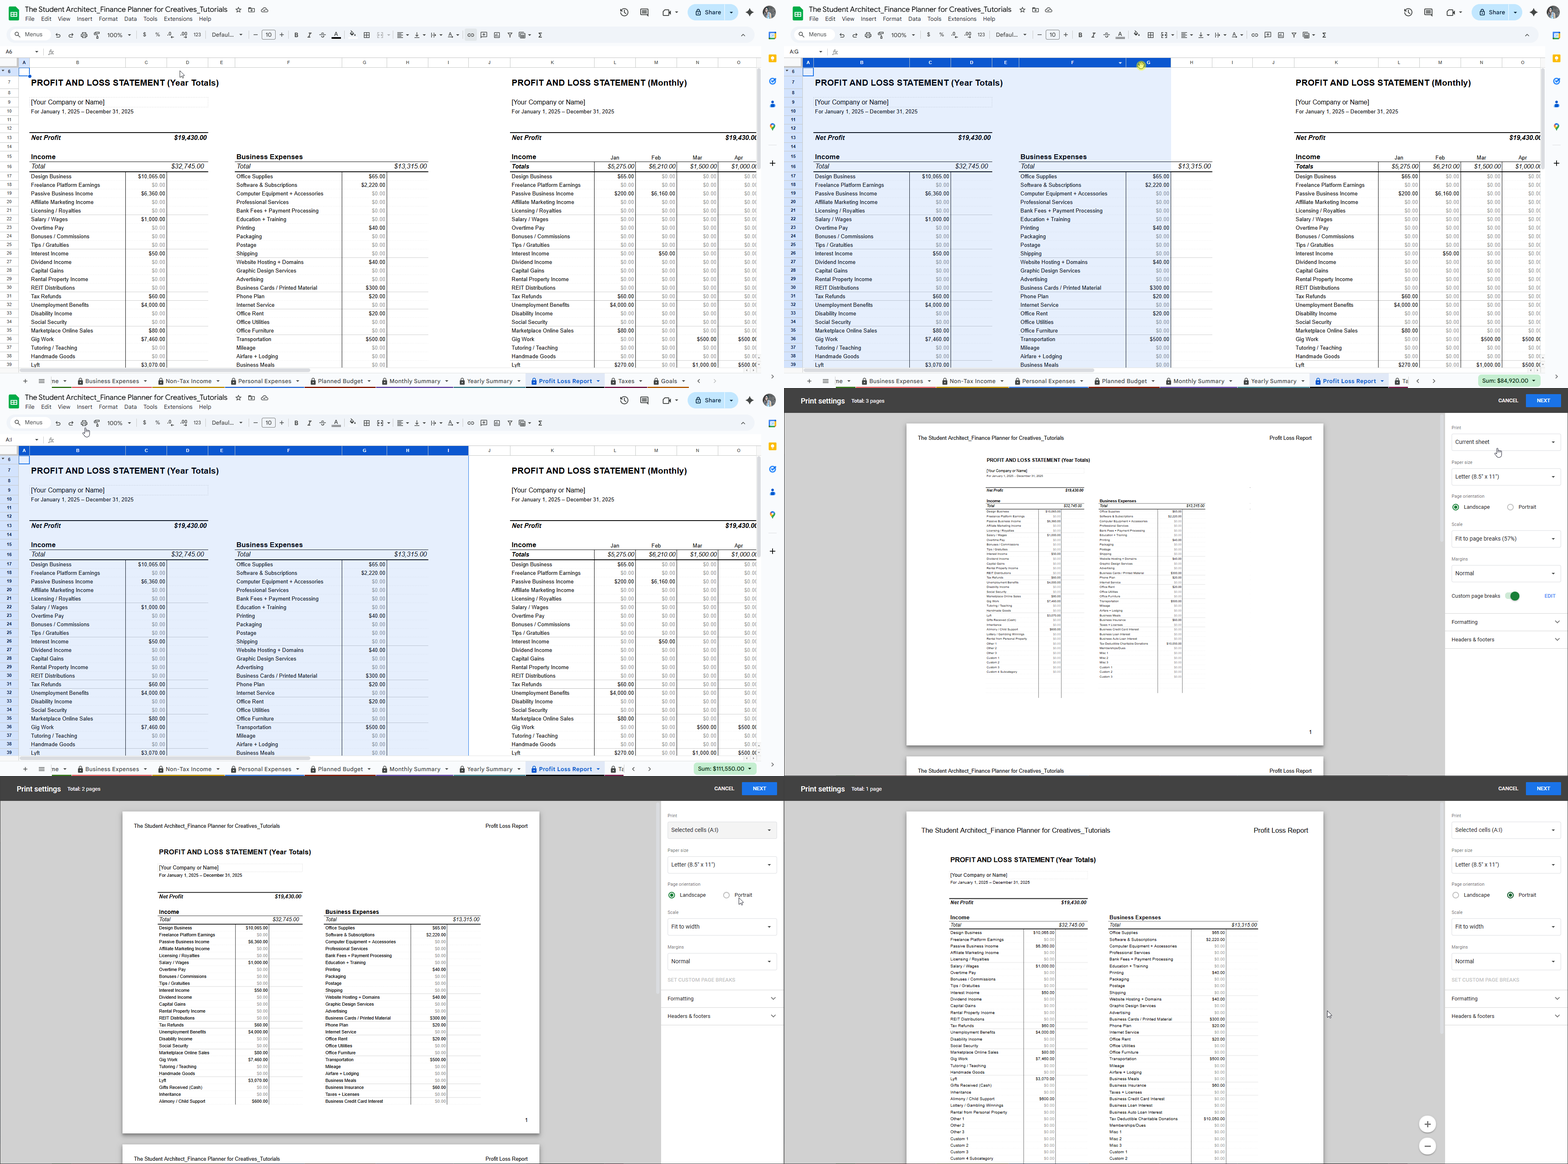
Selected cells – great for printing just a section of the sheet (select the cells before opening the print window)
Entire workbook – prints all sheets at once (this isn’t recommended as different sheets may need different print settings)
How to print selected cells
3. Adjust the Layout
Under Layout, you can fine-tune how your sheet prints:
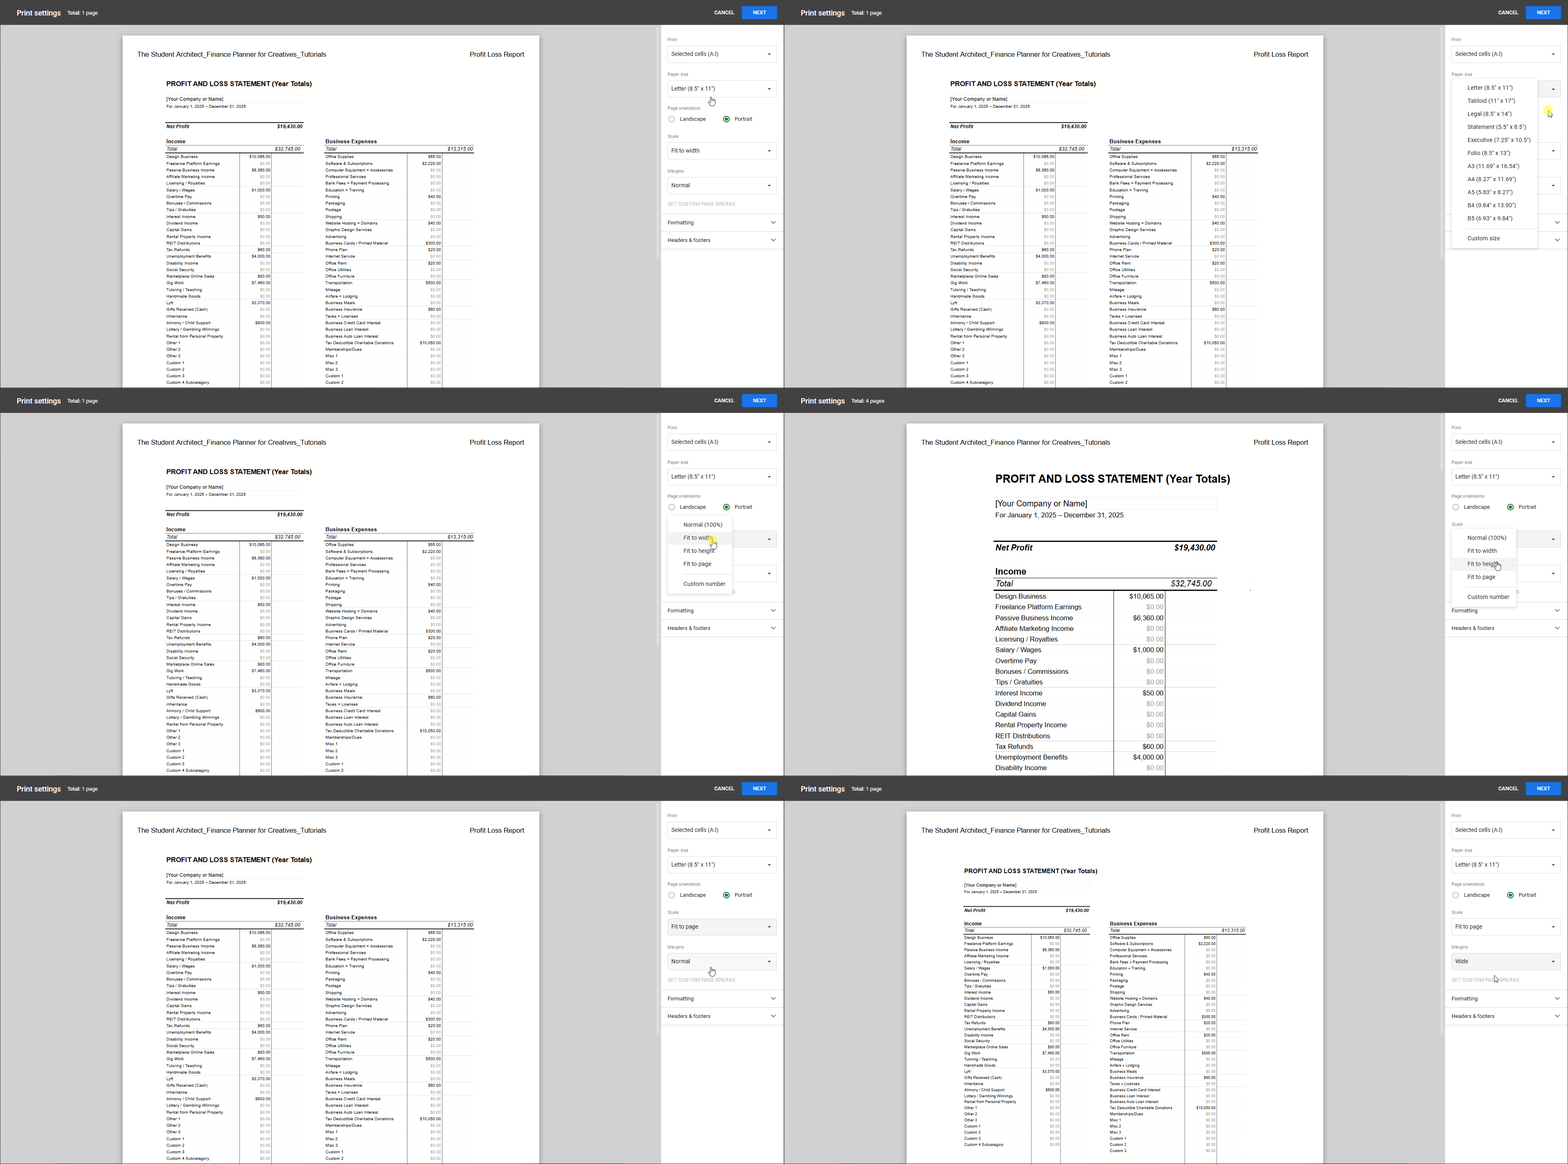
Paper size – Use Letter (8.5x11") or A4 for standard printers
Orientation – Choose between Portrait (vertical) or Landscape (horizontal)
Margins – Choose from Normal, Narrow, or Wide margins to control how much white space surrounds your content
Scaling – Use options like Fit to width, Fit to height, or Fit to page to avoid cutoff columns or reduce excess pages
How to adjust the print layout options
4. Set Page Breaks (Optional)
Need more control over where your page splits?
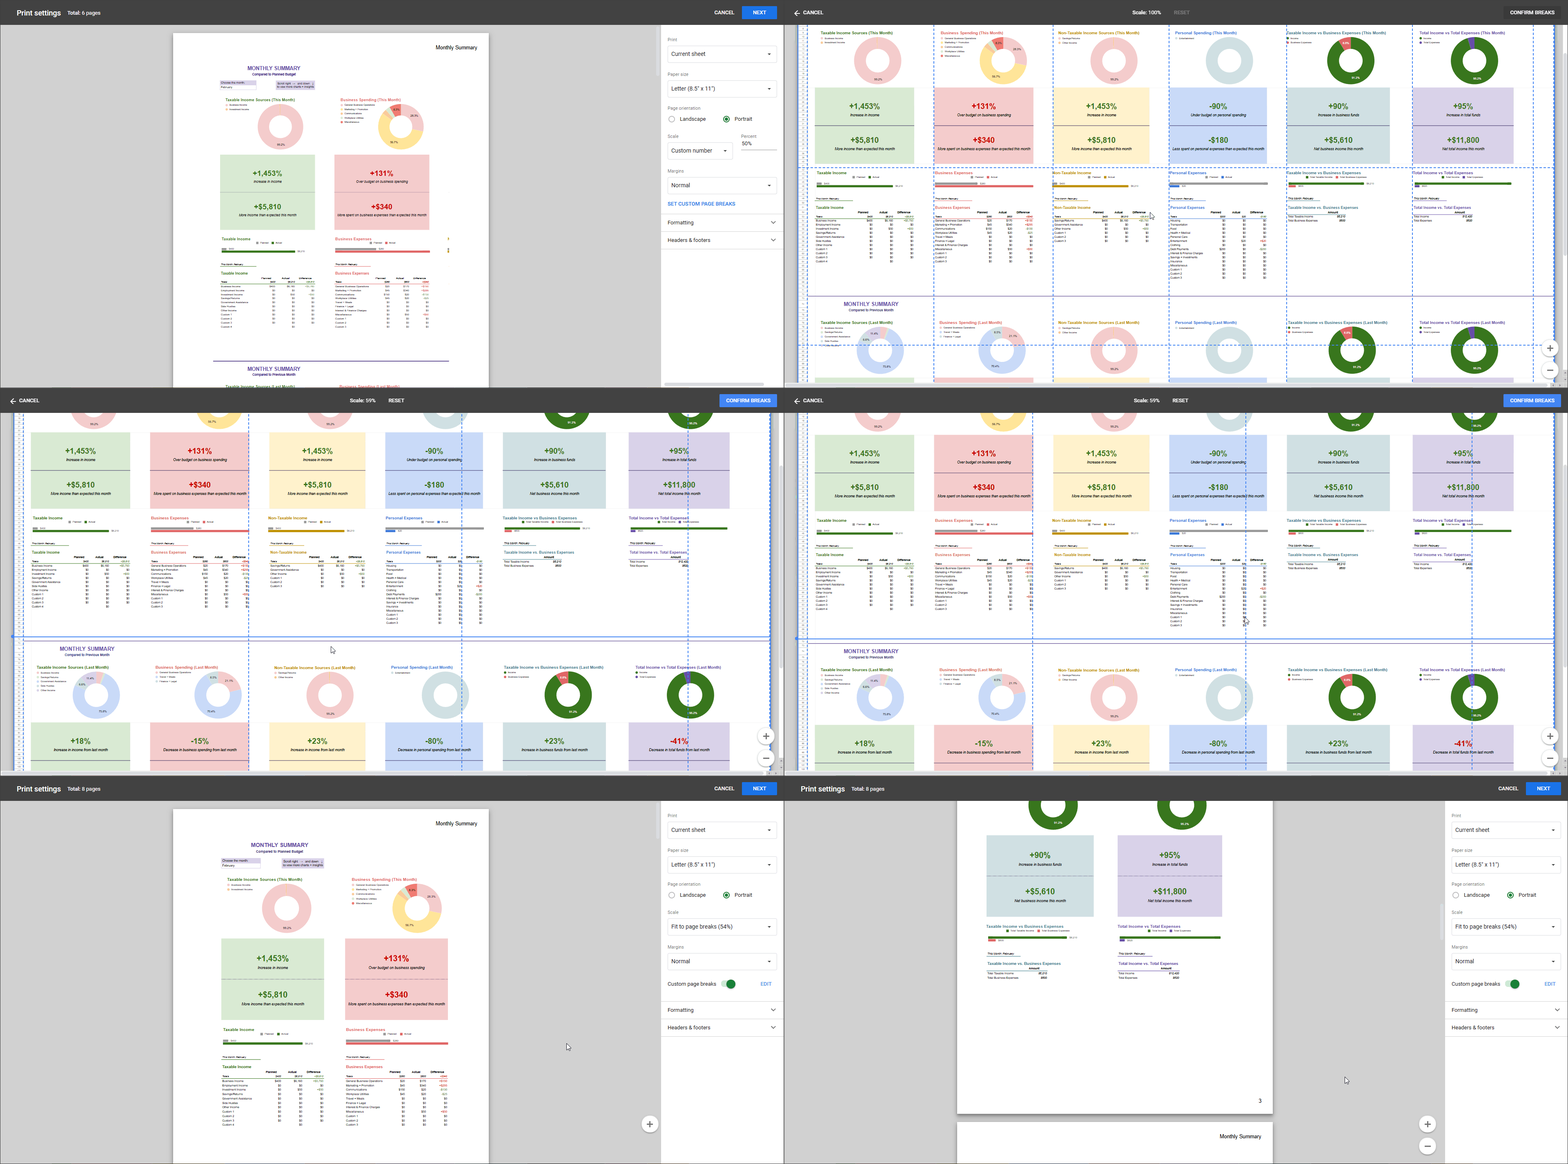
In the Print window, click SET CUSTOM PAGE BREAKS. Drag the blue lines to adjust.
How to set custom page breaks
5. Formatting Options
Fine-tune how your spreadsheet looks on the page:
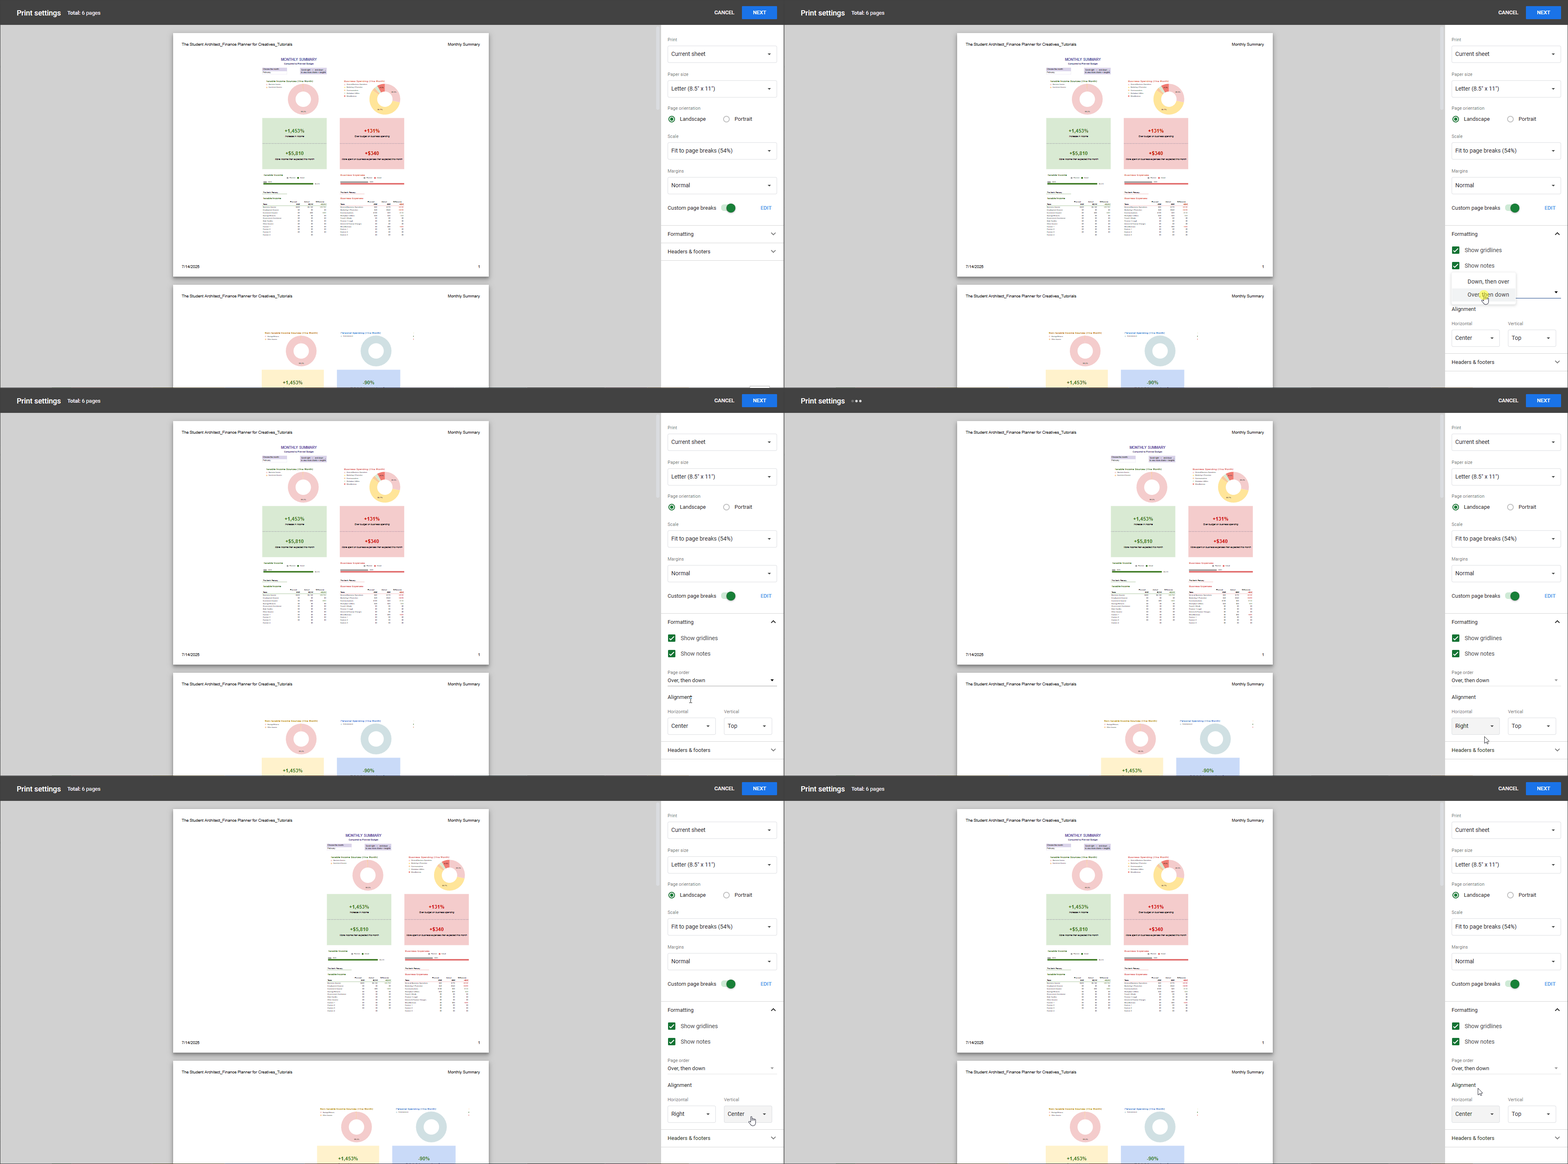
Show or hide gridlines and notes
Page order – Choose whether pages print over, then down (rows first) or down, then over (columns first)
Alignment – Set horizontal and vertical alignment to control how content is positioned within each printed cell (e.g. center-align your data for cleaner printouts)
Adjust print formatting options
6. Headers, Footers + More Options
Expand the Headers & Footers sections to:
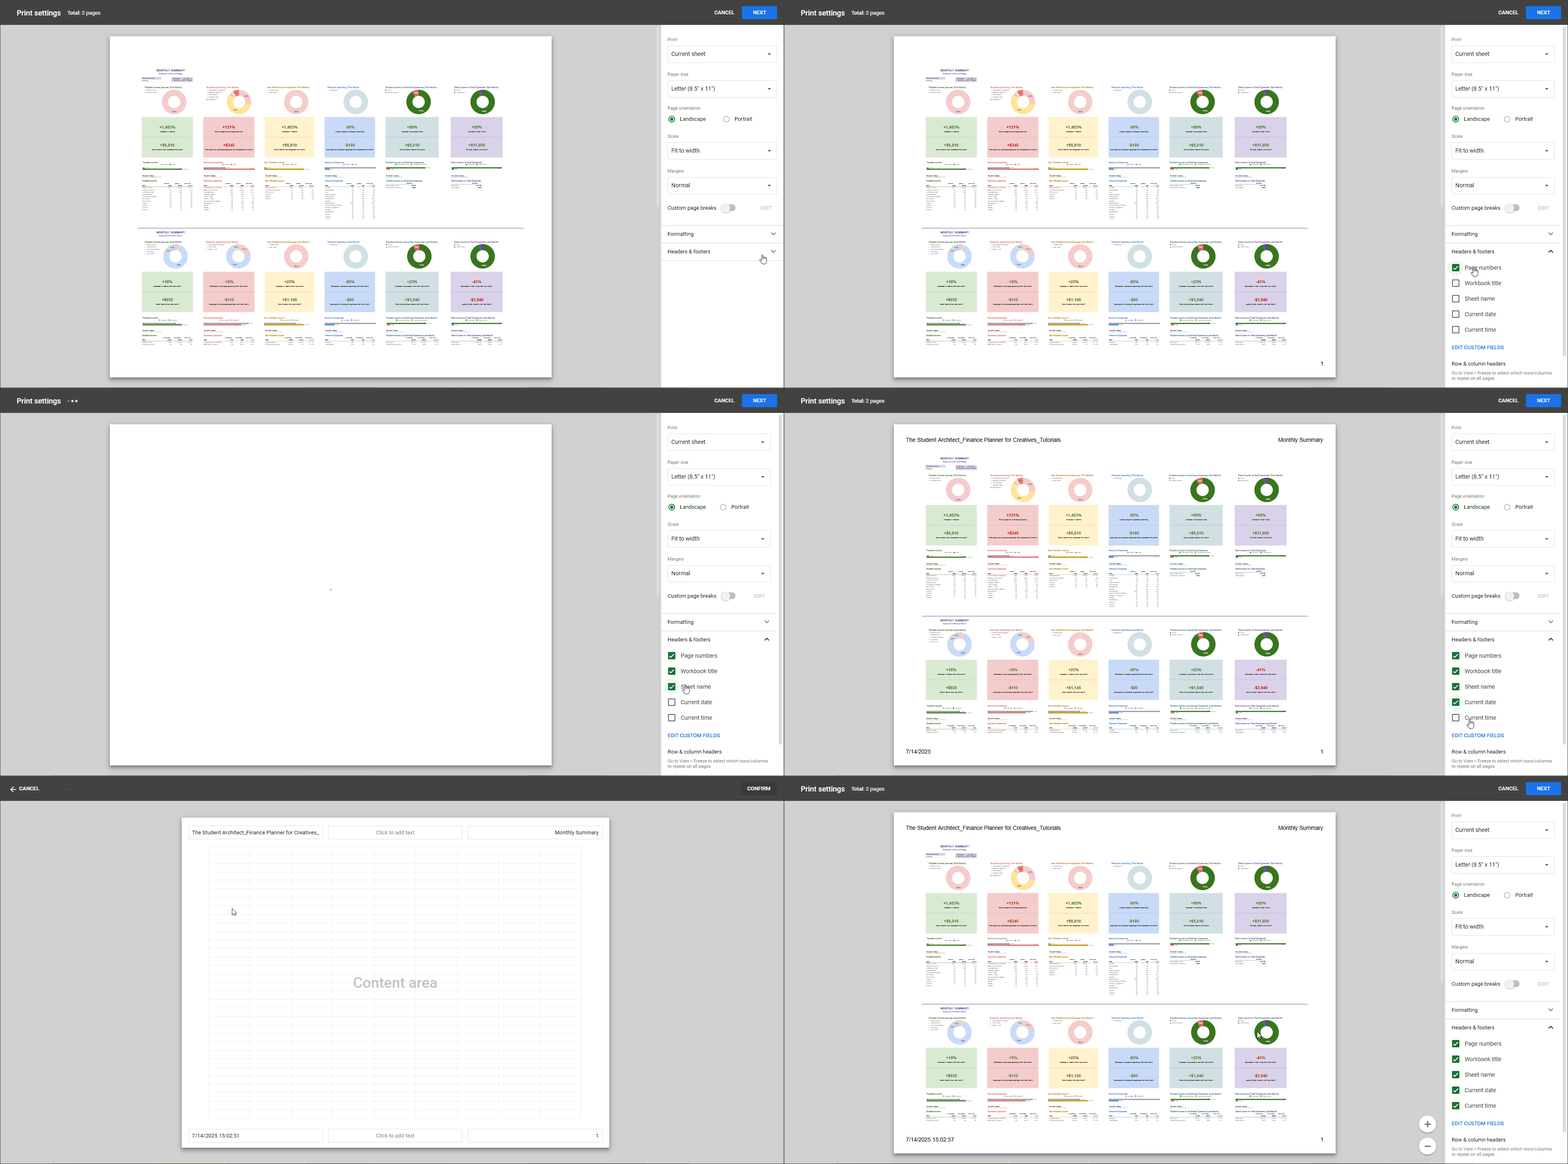
Add a title, date, page numbers, or sheet name
Choose whether to repeat frozen row or column headers on each page
Note: You may get a warning after modifying headers and footers, and it’s okay to ignore this specific warning. See more on popup warnings here.
Adjust your headers and footers
7. Preview + Print
Double-check your preview on the right. When it looks right:
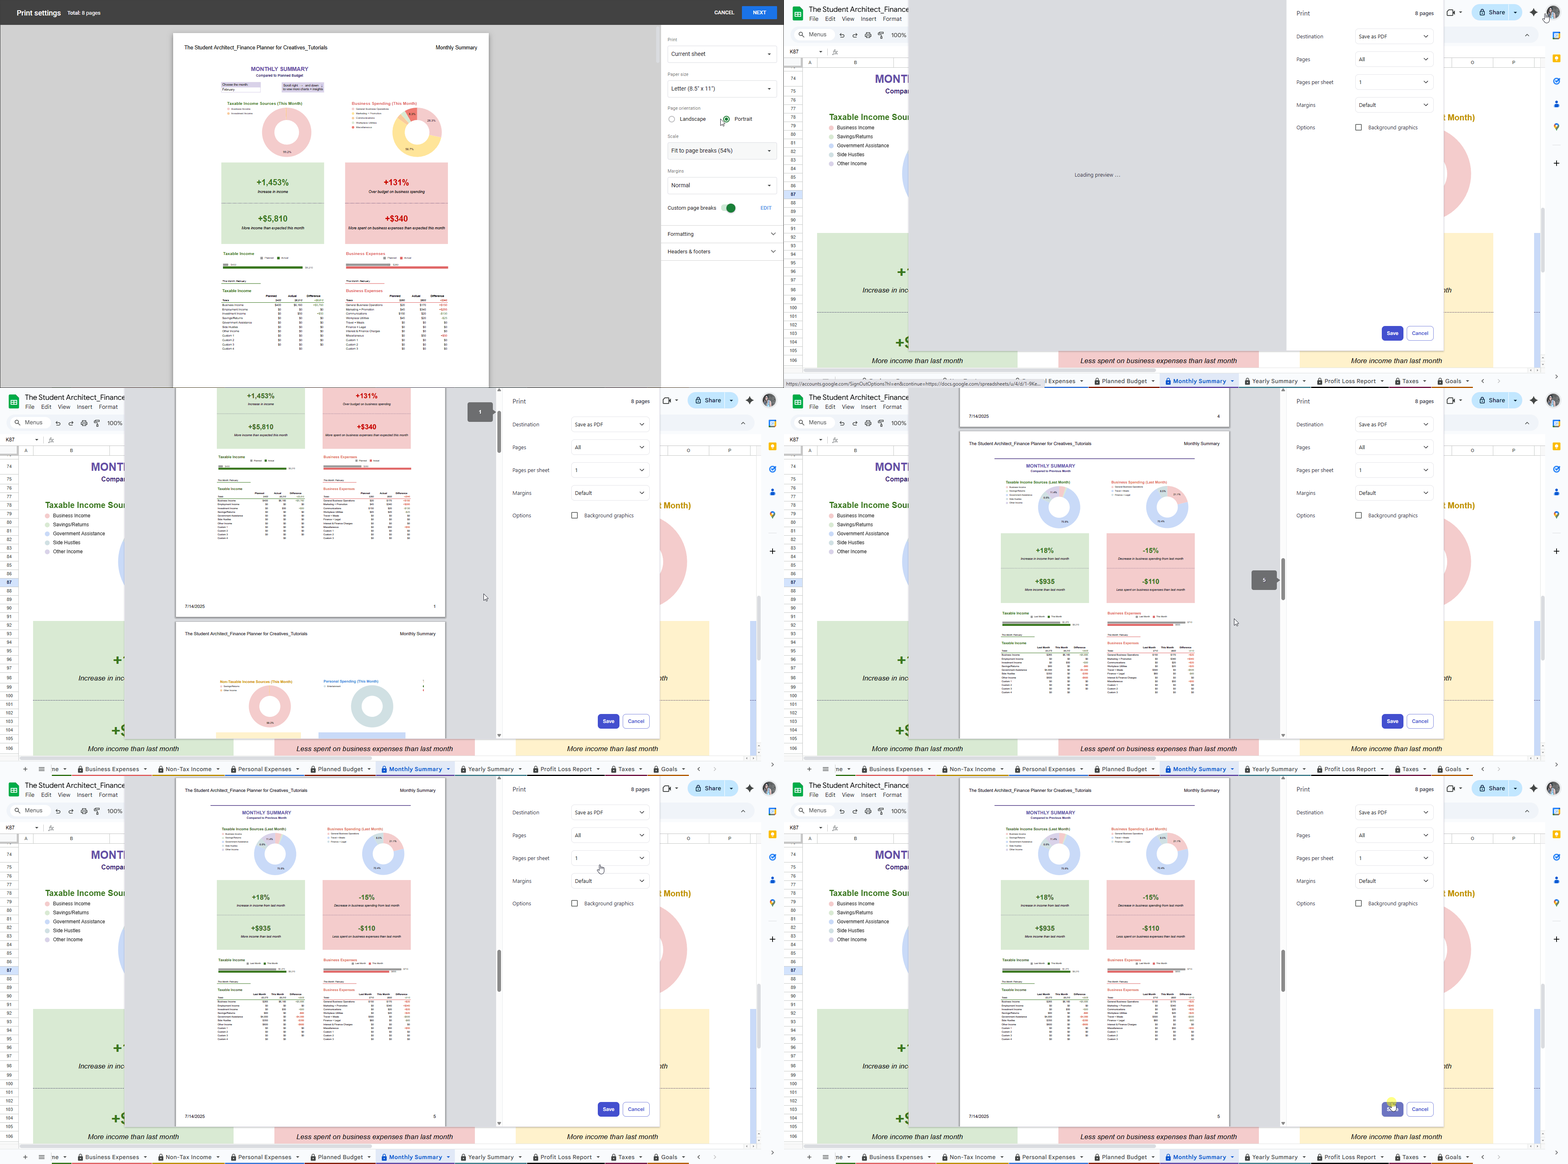
Click Next
Choose your printer or Save as PDF
Click Print
Preview and print or save to PDF
📝 Tips:
Use Selected cells if you only want to print a portion of a sheet.
Try Landscape orientation if your data has lots of columns.
It is recommended that you save a PDF copy before printing, so you have a record.
Hide any instructional rows or columns that you don’t want to appear in your final printout. See how to hide instructional rows or columns here →

